ကြန္ပ်ဴတာ တစ္လံုးမွာ Install လုပ္ထားတဲ့ Software ေတြ အကုန္လံုးကုိ ေနာက္ထပ္အျခား ကြန္ပ်ဴတာတစ္လံုးရဲ႕ Harddisk ထဲသို႔ ( သို့ ) External Hard disk ထဲသို့ ျပသနာ ၁ခုေၾကာငိ့ အေရးၾကံုလာ ရင္ အခ်ိန္တစ္ခဏအတြင္းမွာတင္ စကိအတြင္းက data ေတြ Program ေတြ အကုန္ အဆင္သင့္ ျပန္အသံုးျပဳႏိုင္ ေအာင္ လြယ္လြယ္ကူကူ လုပ္ေဆာင္ေပးႏိုင္ေအာင္ software ႏွင့္ ျပဳလုပ္တာ ျဖစ္ပါတယ္...
Labels: Backup


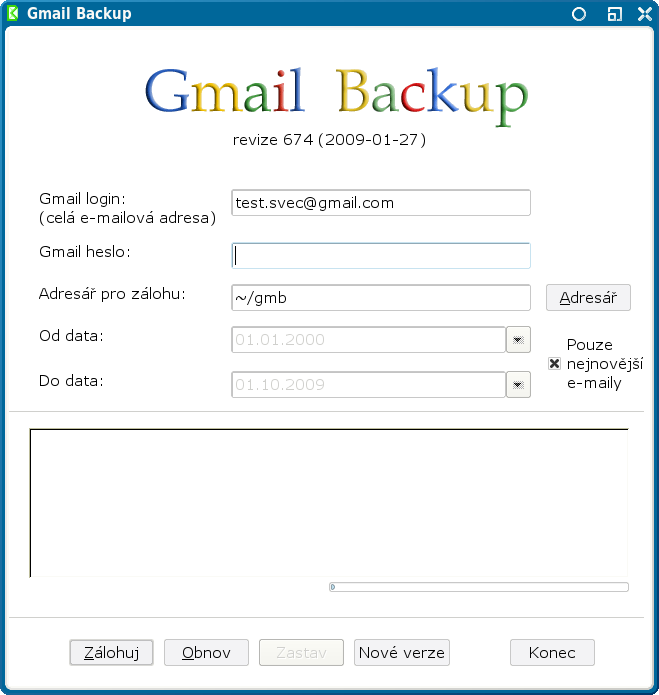
 Gmail Keeper is a email backup software specifically developed for Gmail and Google Apps users. Some of the unique features: 1) Backup & restore all folders including Inbox, Sent Mail, All Mail,...
Labels: Backup, Gmail-II, Websites-IV

DimKum Data Backup ဟာ ႐ိုးရွင္းၿပီး၊ လြယ္ကူစြာအသံုျပဳႏိုင္ပါတယ္။ Data မ်ားကိုလည္းလံုၿခံဳစြာ back up လုပ္ေပးႏိုင္ပါတယ္။ Software ကို Install လုပ္ၿပီးတာနဲ႔ မိမိရဲ႕ data မ်ားကိုဘယ္လို back up လုပ္ရမယ္ဆိုတာကို ရွင္းလင္း ေဖာ္ျပထားပါတယ္။ Data မ်ားကို 1GB ထိအခမဲ့ Back up လုပ္ႏိုင္ပါတယ္။
Labels: Backup, Softwares-III, နည္းပညာမ်ား-III
This short guide will walk you through installing an XML Blogger template from a .txt file on your own computer.
The first thing you do is download the template from the website. If it’s in a .zip file, the next thing you must do is unzip the file, preferably into the same folder that you downloaded it to. This is very simple if you have a file decompressor program installed like Winzip or similar. Here’s a link to some free ones if you don’t have one installed: File Decompressors. Unzipping is easy, normally you can just right click on the file and then select Extract Here.
Once you’ve done that your file will be in a .txt format which can easily be opened in Notepad. It’s not necessary to open the file though, you can use the automated file uploader built into Blogger’s control panel. This makes it extremely easy to install a new template. BUT before you move on to the install you may want to do a complete back up of your template so that you don’t lose your links and buttons. Click here for an easy guide to doing just that: Back up your XML template widget data.
Once you’re satisfied with your backup, go to your blogs’s control panel and click on the Template tab, once that window opens click on the smaller Edit HTML tab just below it. What you’ll see is a page area like in the image below.

Then just click on the Browse button (arrow in photo above) and navigate to the unzipped file. Once the file name shows in the little window, click Upload. And that’s it! You’ve just changed your template the easy way!
Labels: Backup, Blogs, HTML, Templates, နည္းပညာမ်ား-III
This quick guide will walk you through making a backup copy of your entire XML template. This will also allow you to save the data in your widgets for later re-installation. This guide is NOT for restoring your original template!
This is a very simple procedure and will take less than 2 minutes to do. First step is to navigate to your blogs front page so that you are looking at your actual blog, NOT the control panel pages. Next is to view the source code of the page itself, this can be done in two ways. You can either right click anywhere on the page and click on View Source in the pop up window or look on your browsers control bar and look for the word View. Clicking on that will show a drop down list and one of the selections is Source like in the image below.

Once you click on the word Source another window will open showing the entire contents of your template code like in the image below.

Click on the word File in the upper left hand corner and go down to the words Save As. Click on that and then another window will pop up. See the red arrow in the image below, that’s where you type in a name for your old template. Name it anything you want and click Save. Navigate to the folder of your choice on your computer so that you’ll know where it is for future reference.. And that’s it, you just saved a copy of your entire template contents to your computer!

To retrieve the contents of your widgets, you’ll need to open the file you just saved with Notepad, then look thru the file to pick out the sections you want to copy and paste back into your new template’s widgets. This part may take a bit of patience because there will be a lot of code in there. It may take a few minutes to find the parts you want.
Please note, this file can not be used to restore your original blog template, this is just intended to save the widget contents!
Ref: from a blog
Labels: Backup, Blogs, HTML, နည္းပညာမ်ား-III
မွာ download လုပ္ႏိုင္ပါတယ္။

Labels: Backup, Out Look, Softwares-II, နည္းပညာမ်ား-III
အဆင္႔(၁) : Start Button ကို Click ပါ။
အဆင္႔(၂) : Search Box မွာ Regedit လို႔ ရိုက္ထည္႔ျပီး Enter ေခါက္လိုက္ပါ။
အဆင္႔(၃) : Registry Editor Windows တက္လာတဲ႔ အခါ.. File ထဲမွ မွတဆင္႔ Export ၀င္ပါ..( လုပ္ပါ)
အဆင္႔(၄) : Export Registry Box တက္လာရင္ File Name ေနရာမွာ ႏွစ္သက္ရာ တစ္ခုခုေပးပါ.(.ရိုက္ထည္႔ပါ ) ။ ျပီးရင္ Export Range ကို All ေရြးေပးပါ။ အားလံုးျပီးသြားရင္ Save ကို Click လိုက္ပါ။

အဆင္႔(၅) : မိမိ Save လိုက္တဲ႔ ေနရာမွာ အေပၚမွာ ျပထားတဲ႔ ပံုအတိုင္း Registry Back Up ဖိုင္ေလး ရရွိလာမွာျဖစ္ပါတယ္။
အဆင္႔(၆) : အားလံုးျပီးသြားရင္ေတာ႔ Registry Editor ကို ပိတ္လိုက္ပါ။ ဒါဆို ျပီးသြားပါျပီ ။
Labels: Backup, Computer-II, windows, နည္းပညာမ်ား-II
http://blogname.blogspot.com/search?max-results=1000
results=1000
http://blogname.blogspot.com/feeds/comments/default?max-
results=1000
ၿဖစ္ပါတယ္။
Labels: Backup, Blogs, နည္းပညာမ်ား-VI
KKZ Myanmar Unicode Keyboard


MoneTineKeyboard

Like လုပ်ထားနိုင်ပါတယ်

Labels
ဧည့်သည်တော်များခင်ဗျာ
- အခုဖတ်မည့် Post သည် လိင်မှု ပိုင်းဆိုင် ရာများ ကိုရေးသားထားခြင်းဖြစ်ပါသည်......
- သို့သော်ကျွန်တော်တို့ ရေးသား တင်ပြထားရခြင်းသည် ကျန်းမာရေး အတွက် သိထားနားလည် ထားသင့်သည် ဟုယူဆသော်ကြောင့်ဖြစ်ပါသည်.......
- ကျွန်တော်တို့၏ ဆောင်ပုဒ်သည်"ဘယ်အရာမဆို အားလုံးကို လုံးဝမတတ်ရင်နေ သိထား နားလည် ထားနိုင်ရင် ပိုကောင်းတယ်.." ဟု ဖြစ်ပါသည်..

ဧည့်သည်တော်များခင်ဗျာ
- အခုဖတ်မည့် Post သည် လိင်မှု ပိုင်းဆိုင် ရာများ ကိုရေးသားထားခြင်းဖြစ်ပါသည်......
- သို့သော်ကျွန်တော်တို့ ရေးသား တင်ပြထားရခြင်းသည် ကျန်းမာရေး အတွက် သိထားနားလည် ထားသင့်သည် ဟုယူဆသော်ကြောင့်ဖြစ်ပါသည်.......
- ကျွန်တော်တို့၏ ဆောင်ပုဒ်သည်"ဘယ်အရာမဆို အားလုံးကို လုံးဝမတတ်ရင်နေ သိထား နားလည် ထားနိုင်ရင် ပိုကောင်းတယ်.." ဟု ဖြစ်ပါသည်..
ဧည့်သည်တော်များခင်ဗျာ
- အခုဖတ်မည့် Post သည် လိင်မှု ပိုင်းဆိုင် ရာများ ကိုရေးသားထားခြင်းဖြစ်ပါသည်......
- သို့သော်ကျွန်တော်တို့ ရေးသား တင်ပြထားရခြင်းသည် ကျန်းမာရေး အတွက် သိထားနားလည် ထားသင့်သည် ဟုယူဆသော်ကြောင့်ဖြစ်ပါသည်.......
- ကျွန်တော်တို့၏ ဆောင်ပုဒ်သည်"ဘယ်အရာမဆို အားလုံးကို လုံးဝမတတ်ရင်နေ သိထား နားလည် ထားနိုင်ရင် ပိုကောင်းတယ်.." ဟု ဖြစ်ပါသည်..
ဧည့်သည်တော်များခင်ဗျာ
- အခုဖတ်မည့် Post သည် လိင်မှု ပိုင်းဆိုင် ရာများ ကိုရေးသားထားခြင်းဖြစ်ပါသည်......
- သို့သော်ကျွန်တော်တို့ ရေးသား တင်ပြထားရခြင်းသည် ကျန်းမာရေး အတွက် သိထားနားလည် ထားသင့်သည် ဟုယူဆသော်ကြောင့်ဖြစ်ပါသည်.......
- ကျွန်တော်တို့၏ ဆောင်ပုဒ်သည်"ဘယ်အရာမဆို အားလုံးကို လုံးဝမတတ်ရင်နေ သိထား နားလည် ထားနိုင်ရင် ပိုကောင်းတယ်.." ဟု ဖြစ်ပါသည်..
ဧည့်သည်တော်များခင်ဗျာ
- အခုဖတ်မည့် Post သည် လိင်မှု ပိုင်းဆိုင် ရာများ ကိုရေးသားထားခြင်းဖြစ်ပါသည်......
- သို့သော်ကျွန်တော်တို့ ရေးသား တင်ပြထားရခြင်းသည် ကျန်းမာရေး အတွက် သိထားနားလည် ထားသင့်သည် ဟုယူဆသော်ကြောင့်ဖြစ်ပါသည်.......
- ကျွန်တော်တို့၏ ဆောင်ပုဒ်သည်"ဘယ်အရာမဆို အားလုံးကို လုံးဝမတတ်ရင်နေ သိထား နားလည် ထားနိုင်ရင် ပိုကောင်းတယ်.." ဟု ဖြစ်ပါသည်..
ဧည့်သည်တော်များခင်ဗျာ
- အခုဖတ်မည့် Post သည် လိင်မှု ပိုင်းဆိုင် ရာများ ကိုရေးသားထားခြင်းဖြစ်ပါသည်......
- သို့သော်ကျွန်တော်တို့ ရေးသား တင်ပြထားရခြင်းသည် ကျန်းမာရေး အတွက် သိထားနားလည် ထားသင့်သည် ဟုယူဆသော်ကြောင့်ဖြစ်ပါသည်.......
- ကျွန်တော်တို့၏ ဆောင်ပုဒ်သည်"ဘယ်အရာမဆို အားလုံးကို လုံးဝမတတ်ရင်နေ သိထား နားလည် ထားနိုင်ရင် ပိုကောင်းတယ်.." ဟု ဖြစ်ပါသည်..
ဧည့်သည်တော်များခင်ဗျာ
- အခုဖတ်မည့် Post သည် လိင်မှု ပိုင်းဆိုင် ရာများ ကိုရေးသားထားခြင်းဖြစ်ပါသည်......
- သို့သော်ကျွန်တော်တို့ ရေးသား တင်ပြထားရခြင်းသည် ကျန်းမာရေး အတွက် သိထားနားလည် ထားသင့်သည် ဟုယူဆသော်ကြောင့်ဖြစ်ပါသည်.......
- ကျွန်တော်တို့၏ ဆောင်ပုဒ်သည်"ဘယ်အရာမဆို အားလုံးကို လုံးဝမတတ်ရင်နေ သိထား နားလည် ထားနိုင်ရင် ပိုကောင်းတယ်.." ဟု ဖြစ်ပါသည်..
ဧည့်သည်တော်များခင်ဗျာ
- အခုဖတ်မည့် Post သည် လိင်မှု ပိုင်းဆိုင် ရာများ ကိုရေးသားထားခြင်းဖြစ်ပါသည်......
- သို့သော်ကျွန်တော်တို့ ရေးသား တင်ပြထားရခြင်းသည် ကျန်းမာရေး အတွက် သိထားနားလည် ထားသင့်သည် ဟုယူဆသော်ကြောင့်ဖြစ်ပါသည်.......
- ကျွန်တော်တို့၏ ဆောင်ပုဒ်သည်"ဘယ်အရာမဆို အားလုံးကို လုံးဝမတတ်ရင်နေ သိထား နားလည် ထားနိုင်ရင် ပိုကောင်းတယ်.." ဟု ဖြစ်ပါသည်..
ဧည့်သည်တော်များခင်ဗျာ
- အခုဖတ်မည့် Post သည် လိင်မှု ပိုင်းဆိုင် ရာများ ကိုရေးသားထားခြင်းဖြစ်ပါသည်......
- သို့သော်ကျွန်တော်တို့ ရေးသား တင်ပြထားရခြင်းသည် ကျန်းမာရေး အတွက် သိထားနားလည် ထားသင့်သည် ဟုယူဆသော်ကြောင့်ဖြစ်ပါသည်.......
- ကျွန်တော်တို့၏ ဆောင်ပုဒ်သည်"ဘယ်အရာမဆို အားလုံးကို လုံးဝမတတ်ရင်နေ သိထား နားလည် ထားနိုင်ရင် ပိုကောင်းတယ်.." ဟု ဖြစ်ပါသည်..
ဧည့်သည်တော်များခင်ဗျာ
- အခုဖတ်မည့် Post သည် လိင်မှု ပိုင်းဆိုင် ရာများ ကိုရေးသားထားခြင်းဖြစ်ပါသည်......
- သို့သော်ကျွန်တော်တို့ ရေးသား တင်ပြထားရခြင်းသည် ကျန်းမာရေး အတွက် သိထားနားလည် ထားသင့်သည် ဟုယူဆသော်ကြောင့်ဖြစ်ပါသည်.......
- ကျွန်တော်တို့၏ ဆောင်ပုဒ်သည်"ဘယ်အရာမဆို အားလုံးကို လုံးဝမတတ်ရင်နေ သိထား နားလည် ထားနိုင်ရင် ပိုကောင်းတယ်.." ဟု ဖြစ်ပါသည်..
ဧည့်သည်တော်များခင်ဗျာ
- အခုဖတ်မည့် Post သည် လိင်မှု ပိုင်းဆိုင် ရာများ ကိုရေးသားထားခြင်းဖြစ်ပါသည်......
- သို့သော်ကျွန်တော်တို့ ရေးသား တင်ပြထားရခြင်းသည် ကျန်းမာရေး အတွက် သိထားနားလည် ထားသင့်သည် ဟုယူဆသော်ကြောင့်ဖြစ်ပါသည်.......
- ကျွန်တော်တို့၏ ဆောင်ပုဒ်သည်"ဘယ်အရာမဆို အားလုံးကို လုံးဝမတတ်ရင်နေ သိထား နားလည် ထားနိုင်ရင် ပိုကောင်းတယ်.." ဟု ဖြစ်ပါသည်..
ဧည့်သည်တော်များခင်ဗျာ
- အခုဖတ်မည့် Post သည် လိင်မှု ပိုင်းဆိုင် ရာများ ကိုရေးသားထားခြင်းဖြစ်ပါသည်......
- သို့သော်ကျွန်တော်တို့ ရေးသား တင်ပြထားရခြင်းသည် ကျန်းမာရေး အတွက် သိထားနားလည် ထားသင့်သည် ဟုယူဆသော်ကြောင့်ဖြစ်ပါသည်.......
- ကျွန်တော်တို့၏ ဆောင်ပုဒ်သည်"ဘယ်အရာမဆို အားလုံးကို လုံးဝမတတ်ရင်နေ သိထား နားလည် ထားနိုင်ရင် ပိုကောင်းတယ်.." ဟု ဖြစ်ပါသည်..
ဧည့်သည်တော်များခင်ဗျာ
- အခုဖတ်မည့် Post သည် လိင်မှု ပိုင်းဆိုင် ရာများ ကိုရေးသားထားခြင်းဖြစ်ပါသည်......
- သို့သော်ကျွန်တော်တို့ ရေးသား တင်ပြထားရခြင်းသည် ကျန်းမာရေး အတွက် သိထားနားလည် ထားသင့်သည် ဟုယူဆသော်ကြောင့်ဖြစ်ပါသည်.......
- ကျွန်တော်တို့၏ ဆောင်ပုဒ်သည်"ဘယ်အရာမဆို အားလုံးကို လုံးဝမတတ်ရင်နေ သိထား နားလည် ထားနိုင်ရင် ပိုကောင်းတယ်.." ဟု ဖြစ်ပါသည်..
ဧည့်သည်တော်များခင်ဗျာ
- အခုဖတ်မည့် Post သည် လိင်မှု ပိုင်းဆိုင် ရာများ ကိုရေးသားထားခြင်းဖြစ်ပါသည်......
- သို့သော်ကျွန်တော်တို့ ရေးသား တင်ပြထားရခြင်းသည် ကျန်းမာရေး အတွက် သိထားနားလည် ထားသင့်သည် ဟုယူဆသော်ကြောင့်ဖြစ်ပါသည်.......
- ကျွန်တော်တို့၏ ဆောင်ပုဒ်သည်"ဘယ်အရာမဆို အားလုံးကို လုံးဝမတတ်ရင်နေ သိထား နားလည် ထားနိုင်ရင် ပိုကောင်းတယ်.." ဟု ဖြစ်ပါသည်..
ဧည့်သည်တော်များခင်ဗျာ
- အခုဖတ်မည့် Post သည် လိင်မှု ပိုင်းဆိုင် ရာများ ကိုရေးသားထားခြင်းဖြစ်ပါသည်......
- သို့သော်ကျွန်တော်တို့ ရေးသား တင်ပြထားရခြင်းသည် ကျန်းမာရေး အတွက် သိထားနားလည် ထားသင့်သည် ဟုယူဆသော်ကြောင့်ဖြစ်ပါသည်.......
- ကျွန်တော်တို့၏ ဆောင်ပုဒ်သည်"ဘယ်အရာမဆို အားလုံးကို လုံးဝမတတ်ရင်နေ သိထား နားလည် ထားနိုင်ရင် ပိုကောင်းတယ်.." ဟု ဖြစ်ပါသည်..
ဧည့်သည်တော်များခင်ဗျာ
- အခုဖတ်မည့် Post သည် လိင်မှု ပိုင်းဆိုင် ရာများ ကိုရေးသားထားခြင်းဖြစ်ပါသည်......
- သို့သော်ကျွန်တော်တို့ ရေးသား တင်ပြထားရခြင်းသည် ကျန်းမာရေး အတွက် သိထားနားလည် ထားသင့်သည် ဟုယူဆသော်ကြောင့်ဖြစ်ပါသည်.......
- ကျွန်တော်တို့၏ ဆောင်ပုဒ်သည်"ဘယ်အရာမဆို အားလုံးကို လုံးဝမတတ်ရင်နေ သိထား နားလည် ထားနိုင်ရင် ပိုကောင်းတယ်.." ဟု ဖြစ်ပါသည်..
ဧည့်သည်တော်များခင်ဗျာ
- အခုဖတ်မည့် Post သည် လိင်မှု ပိုင်းဆိုင် ရာများ ကိုရေးသားထားခြင်းဖြစ်ပါသည်......
- သို့သော်ကျွန်တော်တို့ ရေးသား တင်ပြထားရခြင်းသည် ကျန်းမာရေး အတွက် သိထားနားလည် ထားသင့်သည် ဟုယူဆသော်ကြောင့်ဖြစ်ပါသည်.......
- ကျွန်တော်တို့၏ ဆောင်ပုဒ်သည်"ဘယ်အရာမဆို အားလုံးကို လုံးဝမတတ်ရင်နေ သိထား နားလည် ထားနိုင်ရင် ပိုကောင်းတယ်.." ဟု ဖြစ်ပါသည်..
ဧည့်သည်တော်များခင်ဗျာ
- အခုဖတ်မည့် Post သည် လိင်မှု ပိုင်းဆိုင် ရာများ ကိုရေးသားထားခြင်းဖြစ်ပါသည်......
- သို့သော်ကျွန်တော်တို့ ရေးသား တင်ပြထားရခြင်းသည် ကျန်းမာရေး အတွက် သိထားနားလည် ထားသင့်သည် ဟုယူဆသော်ကြောင့်ဖြစ်ပါသည်.......
- ကျွန်တော်တို့၏ ဆောင်ပုဒ်သည်"ဘယ်အရာမဆို အားလုံးကို လုံးဝမတတ်ရင်နေ သိထား နားလည် ထားနိုင်ရင် ပိုကောင်းတယ်.." ဟု ဖြစ်ပါသည်..
ဧည့်သည်တော်များခင်ဗျာ
- အခုဖတ်မည့် Post သည် လိင်မှု ပိုင်းဆိုင် ရာများ ကိုရေးသားထားခြင်းဖြစ်ပါသည်......
- သို့သော်ကျွန်တော်တို့ ရေးသား တင်ပြထားရခြင်းသည် ကျန်းမာရေး အတွက် သိထားနားလည် ထားသင့်သည် ဟုယူဆသော်ကြောင့်ဖြစ်ပါသည်.......
- ကျွန်တော်တို့၏ ဆောင်ပုဒ်သည်"ဘယ်အရာမဆို အားလုံးကို လုံးဝမတတ်ရင်နေ သိထား နားလည် ထားနိုင်ရင် ပိုကောင်းတယ်.." ဟု ဖြစ်ပါသည်..
ဧည့်သည်တော်များခင်ဗျာ
- အခုဖတ်မည့် Post သည် လိင်မှု ပိုင်းဆိုင် ရာများ ကိုရေးသားထားခြင်းဖြစ်ပါသည်......
- သို့သော်ကျွန်တော်တို့ ရေးသား တင်ပြထားရခြင်းသည် ကျန်းမာရေး အတွက် သိထားနားလည် ထားသင့်သည် ဟုယူဆသော်ကြောင့်ဖြစ်ပါသည်.......
- ကျွန်တော်တို့၏ ဆောင်ပုဒ်သည်"ဘယ်အရာမဆို အားလုံးကို လုံးဝမတတ်ရင်နေ သိထား နားလည် ထားနိုင်ရင် ပိုကောင်းတယ်.." ဟု ဖြစ်ပါသည်..
ဧည့်သည်တော်များခင်ဗျာ
- အခုဖတ်မည့် Post သည် လိင်မှု ပိုင်းဆိုင် ရာများ ကိုရေးသားထားခြင်းဖြစ်ပါသည်......
- သို့သော်ကျွန်တော်တို့ ရေးသား တင်ပြထားရခြင်းသည် ကျန်းမာရေး အတွက် သိထားနားလည် ထားသင့်သည် ဟုယူဆသော်ကြောင့်ဖြစ်ပါသည်.......
- ကျွန်တော်တို့၏ ဆောင်ပုဒ်သည်"ဘယ်အရာမဆို အားလုံးကို လုံးဝမတတ်ရင်နေ သိထား နားလည် ထားနိုင်ရင် ပိုကောင်းတယ်.." ဟု ဖြစ်ပါသည်..
ဧည့်သည်တော်များခင်ဗျာ
- အခုဖတ်မည့် Post သည် လိင်မှု ပိုင်းဆိုင် ရာများ ကိုရေးသားထားခြင်းဖြစ်ပါသည်......
- သို့သော်ကျွန်တော်တို့ ရေးသား တင်ပြထားရခြင်းသည် ကျန်းမာရေး အတွက် သိထားနားလည် ထားသင့်သည် ဟုယူဆသော်ကြောင့်ဖြစ်ပါသည်.......
- ကျွန်တော်တို့၏ ဆောင်ပုဒ်သည်"ဘယ်အရာမဆို အားလုံးကို လုံးဝမတတ်ရင်နေ သိထား နားလည် ထားနိုင်ရင် ပိုကောင်းတယ်.." ဟု ဖြစ်ပါသည်..
ဧည့်သည်တော်များခင်ဗျာ
- အခုဖတ်မည့် Post သည် လိင်မှု ပိုင်းဆိုင် ရာများ ကိုရေးသားထားခြင်းဖြစ်ပါသည်......
- သို့သော်ကျွန်တော်တို့ ရေးသား တင်ပြထားရခြင်းသည် ကျန်းမာရေး အတွက် သိထားနားလည် ထားသင့်သည် ဟုယူဆသော်ကြောင့်ဖြစ်ပါသည်.......
- ကျွန်တော်တို့၏ ဆောင်ပုဒ်သည်"ဘယ်အရာမဆို အားလုံးကို လုံးဝမတတ်ရင်နေ သိထား နားလည် ထားနိုင်ရင် ပိုကောင်းတယ်.." ဟု ဖြစ်ပါသည်..
ဧည့်သည်တော်များခင်ဗျာ
- အခုဖတ်မည့် Post သည် လိင်မှု ပိုင်းဆိုင် ရာများ ကိုရေးသားထားခြင်းဖြစ်ပါသည်......
- သို့သော်ကျွန်တော်တို့ ရေးသား တင်ပြထားရခြင်းသည် ကျန်းမာရေး အတွက် သိထားနားလည် ထားသင့်သည် ဟုယူဆသော်ကြောင့်ဖြစ်ပါသည်.......
- ကျွန်တော်တို့၏ ဆောင်ပုဒ်သည်"ဘယ်အရာမဆို အားလုံးကို လုံးဝမတတ်ရင်နေ သိထား နားလည် ထားနိုင်ရင် ပိုကောင်းတယ်.." ဟု ဖြစ်ပါသည်..
ဧည့်သည်တော်များခင်ဗျာ
- အခုဖတ်မည့် Post သည် လိင်မှု ပိုင်းဆိုင် ရာများ ကိုရေးသားထားခြင်းဖြစ်ပါသည်......
- သို့သော်ကျွန်တော်တို့ ရေးသား တင်ပြထားရခြင်းသည် ကျန်းမာရေး အတွက် သိထားနားလည် ထားသင့်သည် ဟုယူဆသော်ကြောင့်ဖြစ်ပါသည်.......
- ကျွန်တော်တို့၏ ဆောင်ပုဒ်သည်"ဘယ်အရာမဆို အားလုံးကို လုံးဝမတတ်ရင်နေ သိထား နားလည် ထားနိုင်ရင် ပိုကောင်းတယ်.." ဟု ဖြစ်ပါသည်..
ဧည့်သည်တော်များခင်ဗျာ
- အခုဖတ်မည့် Post သည် လိင်မှု ပိုင်းဆိုင် ရာများ ကိုရေးသားထားခြင်းဖြစ်ပါသည်......
- သို့သော်ကျွန်တော်တို့ ရေးသား တင်ပြထားရခြင်းသည် ကျန်းမာရေး အတွက် သိထားနားလည် ထားသင့်သည် ဟုယူဆသော်ကြောင့်ဖြစ်ပါသည်.......
- ကျွန်တော်တို့၏ ဆောင်ပုဒ်သည်"ဘယ်အရာမဆို အားလုံးကို လုံးဝမတတ်ရင်နေ သိထား နားလည် ထားနိုင်ရင် ပိုကောင်းတယ်.." ဟု ဖြစ်ပါသည်..
ဧည့်သည်တော်များခင်ဗျာ
- အခုဖတ်မည့် Post သည် လိင်မှု ပိုင်းဆိုင် ရာများ ကိုရေးသားထားခြင်းဖြစ်ပါသည်......
- သို့သော်ကျွန်တော်တို့ ရေးသား တင်ပြထားရခြင်းသည် ကျန်းမာရေး အတွက် သိထားနားလည် ထားသင့်သည် ဟုယူဆသော်ကြောင့်ဖြစ်ပါသည်.......
- ကျွန်တော်တို့၏ ဆောင်ပုဒ်သည်"ဘယ်အရာမဆို အားလုံးကို လုံးဝမတတ်ရင်နေ သိထား နားလည် ထားနိုင်ရင် ပိုကောင်းတယ်.." ဟု ဖြစ်ပါသည်..
ဧည့်သည်တော်များခင်ဗျာ
- အခုဖတ်မည့် Post သည် လိင်မှု ပိုင်းဆိုင် ရာများ ကိုရေးသားထားခြင်းဖြစ်ပါသည်......
- သို့သော်ကျွန်တော်တို့ ရေးသား တင်ပြထားရခြင်းသည် ကျန်းမာရေး အတွက် သိထားနားလည် ထားသင့်သည် ဟုယူဆသော်ကြောင့်ဖြစ်ပါသည်.......
- ကျွန်တော်တို့၏ ဆောင်ပုဒ်သည်"ဘယ်အရာမဆို အားလုံးကို လုံးဝမတတ်ရင်နေ သိထား နားလည် ထားနိုင်ရင် ပိုကောင်းတယ်.." ဟု ဖြစ်ပါသည်..
ဧည့်သည်တော်များခင်ဗျာ
- အခုဖတ်မည့် Post သည် လိင်မှု ပိုင်းဆိုင် ရာများ ကိုရေးသားထားခြင်းဖြစ်ပါသည်......
- သို့သော်ကျွန်တော်တို့ ရေးသား တင်ပြထားရခြင်းသည် ကျန်းမာရေး အတွက် သိထားနားလည် ထားသင့်သည် ဟုယူဆသော်ကြောင့်ဖြစ်ပါသည်.......
- ကျွန်တော်တို့၏ ဆောင်ပုဒ်သည်"ဘယ်အရာမဆို အားလုံးကို လုံးဝမတတ်ရင်နေ သိထား နားလည် ထားနိုင်ရင် ပိုကောင်းတယ်.." ဟု ဖြစ်ပါသည်..
ဧည့်သည်တော်များခင်ဗျာ
- အခုဖတ်မည့် Post သည် လိင်မှု ပိုင်းဆိုင် ရာများ ကိုရေးသားထားခြင်းဖြစ်ပါသည်......
- သို့သော်ကျွန်တော်တို့ ရေးသား တင်ပြထားရခြင်းသည် ကျန်းမာရေး အတွက် သိထားနားလည် ထားသင့်သည် ဟုယူဆသော်ကြောင့်ဖြစ်ပါသည်.......
- ကျွန်တော်တို့၏ ဆောင်ပုဒ်သည်"ဘယ်အရာမဆို အားလုံးကို လုံးဝမတတ်ရင်နေ သိထား နားလည် ထားနိုင်ရင် ပိုကောင်းတယ်.." ဟု ဖြစ်ပါသည်..
ဧည့်သည်တော်များခင်ဗျာ
- အခုဖတ်မည့် Post သည် လိင်မှု ပိုင်းဆိုင် ရာများ ကိုရေးသားထားခြင်းဖြစ်ပါသည်......
- သို့သော်ကျွန်တော်တို့ ရေးသား တင်ပြထားရခြင်းသည် ကျန်းမာရေး အတွက် သိထားနားလည် ထားသင့်သည် ဟုယူဆသော်ကြောင့်ဖြစ်ပါသည်.......
- ကျွန်တော်တို့၏ ဆောင်ပုဒ်သည်"ဘယ်အရာမဆို အားလုံးကို လုံးဝမတတ်ရင်နေ သိထား နားလည် ထားနိုင်ရင် ပိုကောင်းတယ်.." ဟု ဖြစ်ပါသည်..
ဧည့်သည်တော်များခင်ဗျာ
- အခုဖတ်မည့် Post သည် လိင်မှု ပိုင်းဆိုင် ရာများ ကိုရေးသားထားခြင်းဖြစ်ပါသည်......
- သို့သော်ကျွန်တော်တို့ ရေးသား တင်ပြထားရခြင်းသည် ကျန်းမာရေး အတွက် သိထားနားလည် ထားသင့်သည် ဟုယူဆသော်ကြောင့်ဖြစ်ပါသည်.......
- ကျွန်တော်တို့၏ ဆောင်ပုဒ်သည်"ဘယ်အရာမဆို အားလုံးကို လုံးဝမတတ်ရင်နေ သိထား နားလည် ထားနိုင်ရင် ပိုကောင်းတယ်.." ဟု ဖြစ်ပါသည်..
ဧည့်သည်တော်များခင်ဗျာ
- အခုဖတ်မည့် Post သည် လိင်မှု ပိုင်းဆိုင် ရာများ ကိုရေးသားထားခြင်းဖြစ်ပါသည်......
- သို့သော်ကျွန်တော်တို့ ရေးသား တင်ပြထားရခြင်းသည် ကျန်းမာရေး အတွက် သိထားနားလည် ထားသင့်သည် ဟုယူဆသော်ကြောင့်ဖြစ်ပါသည်.......
- ကျွန်တော်တို့၏ ဆောင်ပုဒ်သည်"ဘယ်အရာမဆို အားလုံးကို လုံးဝမတတ်ရင်နေ သိထား နားလည် ထားနိုင်ရင် ပိုကောင်းတယ်.." ဟု ဖြစ်ပါသည်..
ဧည့်သည်တော်များခင်ဗျာ
- အခုဖတ်မည့် Post သည် လိင်မှု ပိုင်းဆိုင် ရာများ ကိုရေးသားထားခြင်းဖြစ်ပါသည်......
- သို့သော်ကျွန်တော်တို့ ရေးသား တင်ပြထားရခြင်းသည် ကျန်းမာရေး အတွက် သိထားနားလည် ထားသင့်သည် ဟုယူဆသော်ကြောင့်ဖြစ်ပါသည်.......
- ကျွန်တော်တို့၏ ဆောင်ပုဒ်သည်"ဘယ်အရာမဆို အားလုံးကို လုံးဝမတတ်ရင်နေ သိထား နားလည် ထားနိုင်ရင် ပိုကောင်းတယ်.." ဟု ဖြစ်ပါသည်..
ဧည့်သည်တော်များခင်ဗျာ
- အခုဖတ်မည့် Post သည် လိင်မှု ပိုင်းဆိုင် ရာများ ကိုရေးသားထားခြင်းဖြစ်ပါသည်......
- သို့သော်ကျွန်တော်တို့ ရေးသား တင်ပြထားရခြင်းသည် ကျန်းမာရေး အတွက် သိထားနားလည် ထားသင့်သည် ဟုယူဆသော်ကြောင့်ဖြစ်ပါသည်.......
- ကျွန်တော်တို့၏ ဆောင်ပုဒ်သည်"ဘယ်အရာမဆို အားလုံးကို လုံးဝမတတ်ရင်နေ သိထား နားလည် ထားနိုင်ရင် ပိုကောင်းတယ်.." ဟု ဖြစ်ပါသည်..
ဧည့်သည်တော်များခင်ဗျာ
- အခုဖတ်မည့် Post သည် လိင်မှု ပိုင်းဆိုင် ရာများ ကိုရေးသားထားခြင်းဖြစ်ပါသည်......
- သို့သော်ကျွန်တော်တို့ ရေးသား တင်ပြထားရခြင်းသည် ကျန်းမာရေး အတွက် သိထားနားလည် ထားသင့်သည် ဟုယူဆသော်ကြောင့်ဖြစ်ပါသည်.......
- ကျွန်တော်တို့၏ ဆောင်ပုဒ်သည်"ဘယ်အရာမဆို အားလုံးကို လုံးဝမတတ်ရင်နေ သိထား နားလည် ထားနိုင်ရင် ပိုကောင်းတယ်.." ဟု ဖြစ်ပါသည်..
ဧည့်သည်တော်များခင်ဗျာ
- အခုဖတ်မည့် Post သည် လိင်မှု ပိုင်းဆိုင် ရာများ ကိုရေးသားထားခြင်းဖြစ်ပါသည်......
- သို့သော်ကျွန်တော်တို့ ရေးသား တင်ပြထားရခြင်းသည် ကျန်းမာရေး အတွက် သိထားနားလည် ထားသင့်သည် ဟုယူဆသော်ကြောင့်ဖြစ်ပါသည်.......
- ကျွန်တော်တို့၏ ဆောင်ပုဒ်သည်"ဘယ်အရာမဆို အားလုံးကို လုံးဝမတတ်ရင်နေ သိထား နားလည် ထားနိုင်ရင် ပိုကောင်းတယ်.." ဟု ဖြစ်ပါသည်..
ဧည့်သည်တော်များခင်ဗျာ
- အခုဖတ်မည့် Post သည် လိင်မှု ပိုင်းဆိုင် ရာများ ကိုရေးသားထားခြင်းဖြစ်ပါသည်......
- သို့သော်ကျွန်တော်တို့ ရေးသား တင်ပြထားရခြင်းသည် ကျန်းမာရေး အတွက် သိထားနားလည် ထားသင့်သည် ဟုယူဆသော်ကြောင့်ဖြစ်ပါသည်.......
- ကျွန်တော်တို့၏ ဆောင်ပုဒ်သည်"ဘယ်အရာမဆို အားလုံးကို လုံးဝမတတ်ရင်နေ သိထား နားလည် ထားနိုင်ရင် ပိုကောင်းတယ်.." ဟု ဖြစ်ပါသည်..
ဧည့်သည်တော်များခင်ဗျာ
- အခုဖတ်မည့် Post သည် လိင်မှု ပိုင်းဆိုင် ရာများ ကိုရေးသားထားခြင်းဖြစ်ပါသည်......
- သို့သော်ကျွန်တော်တို့ ရေးသား တင်ပြထားရခြင်းသည် ကျန်းမာရေး အတွက် သိထားနားလည် ထားသင့်သည် ဟုယူဆသော်ကြောင့်ဖြစ်ပါသည်.......
- ကျွန်တော်တို့၏ ဆောင်ပုဒ်သည်"ဘယ်အရာမဆို အားလုံးကို လုံးဝမတတ်ရင်နေ သိထား နားလည် ထားနိုင်ရင် ပိုကောင်းတယ်.." ဟု ဖြစ်ပါသည်..
ဧည့်သည်တော်များခင်ဗျာ
- အခုဖတ်မည့် Post သည် လိင်မှု ပိုင်းဆိုင် ရာများ ကိုရေးသားထားခြင်းဖြစ်ပါသည်......
- သို့သော်ကျွန်တော်တို့ ရေးသား တင်ပြထားရခြင်းသည် ကျန်းမာရေး အတွက် သိထားနားလည် ထားသင့်သည် ဟုယူဆသော်ကြောင့်ဖြစ်ပါသည်.......
- ကျွန်တော်တို့၏ ဆောင်ပုဒ်သည်"ဘယ်အရာမဆို အားလုံးကို လုံးဝမတတ်ရင်နေ သိထား နားလည် ထားနိုင်ရင် ပိုကောင်းတယ်.." ဟု ဖြစ်ပါသည်..
ဧည့်သည်တော်များခင်ဗျာ
- အခုဖတ်မည့် Post သည် လိင်မှု ပိုင်းဆိုင် ရာများ ကိုရေးသားထားခြင်းဖြစ်ပါသည်......
- သို့သော်ကျွန်တော်တို့ ရေးသား တင်ပြထားရခြင်းသည် ကျန်းမာရေး အတွက် သိထားနားလည် ထားသင့်သည် ဟုယူဆသော်ကြောင့်ဖြစ်ပါသည်.......
- ကျွန်တော်တို့၏ ဆောင်ပုဒ်သည်"ဘယ်အရာမဆို အားလုံးကို လုံးဝမတတ်ရင်နေ သိထား နားလည် ထားနိုင်ရင် ပိုကောင်းတယ်.." ဟု ဖြစ်ပါသည်..
ဧည့်သည်တော်များခင်ဗျာ
- အခုဖတ်မည့် Post သည် လိင်မှု ပိုင်းဆိုင် ရာများ ကိုရေးသားထားခြင်းဖြစ်ပါသည်......
- သို့သော်ကျွန်တော်တို့ ရေးသား တင်ပြထားရခြင်းသည် ကျန်းမာရေး အတွက် သိထားနားလည် ထားသင့်သည် ဟုယူဆသော်ကြောင့်ဖြစ်ပါသည်.......
- ကျွန်တော်တို့၏ ဆောင်ပုဒ်သည်"ဘယ်အရာမဆို အားလုံးကို လုံးဝမတတ်ရင်နေ သိထား နားလည် ထားနိုင်ရင် ပိုကောင်းတယ်.." ဟု ဖြစ်ပါသည်..
ဧည့်သည်တော်များခင်ဗျာ
- အခုဖတ်မည့် Post သည် လိင်မှု ပိုင်းဆိုင် ရာများ ကိုရေးသားထားခြင်းဖြစ်ပါသည်......
- သို့သော်ကျွန်တော်တို့ ရေးသား တင်ပြထားရခြင်းသည် ကျန်းမာရေး အတွက် သိထားနားလည် ထားသင့်သည် ဟုယူဆသော်ကြောင့်ဖြစ်ပါသည်.......
- ကျွန်တော်တို့၏ ဆောင်ပုဒ်သည်"ဘယ်အရာမဆို အားလုံးကို လုံးဝမတတ်ရင်နေ သိထား နားလည် ထားနိုင်ရင် ပိုကောင်းတယ်.." ဟု ဖြစ်ပါသည်..
ဧည့်သည်တော်များခင်ဗျာ
- အခုဖတ်မည့် Post သည် လိင်မှု ပိုင်းဆိုင် ရာများ ကိုရေးသားထားခြင်းဖြစ်ပါသည်......
- သို့သော်ကျွန်တော်တို့ ရေးသား တင်ပြထားရခြင်းသည် ကျန်းမာရေး အတွက် သိထားနားလည် ထားသင့်သည် ဟုယူဆသော်ကြောင့်ဖြစ်ပါသည်.......
- ကျွန်တော်တို့၏ ဆောင်ပုဒ်သည်"ဘယ်အရာမဆို အားလုံးကို လုံးဝမတတ်ရင်နေ သိထား နားလည် ထားနိုင်ရင် ပိုကောင်းတယ်.." ဟု ဖြစ်ပါသည်..
ဧည့်သည်တော်များခင်ဗျာ
- အခုဖတ်မည့် Post သည် လိင်မှု ပိုင်းဆိုင် ရာများ ကိုရေးသားထားခြင်းဖြစ်ပါသည်......
- သို့သော်ကျွန်တော်တို့ ရေးသား တင်ပြထားရခြင်းသည် ကျန်းမာရေး အတွက် သိထားနားလည် ထားသင့်သည် ဟုယူဆသော်ကြောင့်ဖြစ်ပါသည်.......
- ကျွန်တော်တို့၏ ဆောင်ပုဒ်သည်"ဘယ်အရာမဆို အားလုံးကို လုံးဝမတတ်ရင်နေ သိထား နားလည် ထားနိုင်ရင် ပိုကောင်းတယ်.." ဟု ဖြစ်ပါသည်..
ဧည့်သည်တော်များခင်ဗျာ
- အခုဖတ်မည့် Post သည် လိင်မှု ပိုင်းဆိုင် ရာများ ကိုရေးသားထားခြင်းဖြစ်ပါသည်......
- သို့သော်ကျွန်တော်တို့ ရေးသား တင်ပြထားရခြင်းသည် ကျန်းမာရေး အတွက် သိထားနားလည် ထားသင့်သည် ဟုယူဆသော်ကြောင့်ဖြစ်ပါသည်.......
- ကျွန်တော်တို့၏ ဆောင်ပုဒ်သည်"ဘယ်အရာမဆို အားလုံးကို လုံးဝမတတ်ရင်နေ သိထား နားလည် ထားနိုင်ရင် ပိုကောင်းတယ်.." ဟု ဖြစ်ပါသည်..
ဧည့်သည်တော်များခင်ဗျာ
- အခုဖတ်မည့် Post သည် လိင်မှု ပိုင်းဆိုင် ရာများ ကိုရေးသားထားခြင်းဖြစ်ပါသည်......
- သို့သော်ကျွန်တော်တို့ ရေးသား တင်ပြထားရခြင်းသည် ကျန်းမာရေး အတွက် သိထားနားလည် ထားသင့်သည် ဟုယူဆသော်ကြောင့်ဖြစ်ပါသည်.......
- ကျွန်တော်တို့၏ ဆောင်ပုဒ်သည်"ဘယ်အရာမဆို အားလုံးကို လုံးဝမတတ်ရင်နေ သိထား နားလည် ထားနိုင်ရင် ပိုကောင်းတယ်.." ဟု ဖြစ်ပါသည်..
ဧည့်သည်တော်များခင်ဗျာ
- အခုဖတ်မည့် Post သည် လိင်မှု ပိုင်းဆိုင် ရာများ ကိုရေးသားထားခြင်းဖြစ်ပါသည်......
- သို့သော်ကျွန်တော်တို့ ရေးသား တင်ပြထားရခြင်းသည် ကျန်းမာရေး အတွက် သိထားနားလည် ထားသင့်သည် ဟုယူဆသော်ကြောင့်ဖြစ်ပါသည်.......
- ကျွန်တော်တို့၏ ဆောင်ပုဒ်သည်"ဘယ်အရာမဆို အားလုံးကို လုံးဝမတတ်ရင်နေ သိထား နားလည် ထားနိုင်ရင် ပိုကောင်းတယ်.." ဟု ဖြစ်ပါသည်..
ဧည့်သည်တော်များခင်ဗျာ
- အခုဖတ်မည့် Post သည် လိင်မှု ပိုင်းဆိုင် ရာများ ကိုရေးသားထားခြင်းဖြစ်ပါသည်......
- သို့သော်ကျွန်တော်တို့ ရေးသား တင်ပြထားရခြင်းသည် ကျန်းမာရေး အတွက် သိထားနားလည် ထားသင့်သည် ဟုယူဆသော်ကြောင့်ဖြစ်ပါသည်.......
- ကျွန်တော်တို့၏ ဆောင်ပုဒ်သည်"ဘယ်အရာမဆို အားလုံးကို လုံးဝမတတ်ရင်နေ သိထား နားလည် ထားနိုင်ရင် ပိုကောင်းတယ်.." ဟု ဖြစ်ပါသည်..
ဧည့်သည်တော်များခင်ဗျာ
- အခုဖတ်မည့် Post သည် လိင်မှု ပိုင်းဆိုင် ရာများ ကိုရေးသားထားခြင်းဖြစ်ပါသည်......
- သို့သော်ကျွန်တော်တို့ ရေးသား တင်ပြထားရခြင်းသည် ကျန်းမာရေး အတွက် သိထားနားလည် ထားသင့်သည် ဟုယူဆသော်ကြောင့်ဖြစ်ပါသည်.......
- ကျွန်တော်တို့၏ ဆောင်ပုဒ်သည်"ဘယ်အရာမဆို အားလုံးကို လုံးဝမတတ်ရင်နေ သိထား နားလည် ထားနိုင်ရင် ပိုကောင်းတယ်.." ဟု ဖြစ်ပါသည်..
ဧည့်သည်တော်များခင်ဗျာ
- အခုဖတ်မည့် Post သည် လိင်မှု ပိုင်းဆိုင် ရာများ ကိုရေးသားထားခြင်းဖြစ်ပါသည်......
- သို့သော်ကျွန်တော်တို့ ရေးသား တင်ပြထားရခြင်းသည် ကျန်းမာရေး အတွက် သိထားနားလည် ထားသင့်သည် ဟုယူဆသော်ကြောင့်ဖြစ်ပါသည်.......
- ကျွန်တော်တို့၏ ဆောင်ပုဒ်သည်"ဘယ်အရာမဆို အားလုံးကို လုံးဝမတတ်ရင်နေ သိထား နားလည် ထားနိုင်ရင် ပိုကောင်းတယ်.." ဟု ဖြစ်ပါသည်..
ဧည့်သည်တော်များခင်ဗျာ
- အခုဖတ်မည့် Post သည် လိင်မှု ပိုင်းဆိုင် ရာများ ကိုရေးသားထားခြင်းဖြစ်ပါသည်......
- သို့သော်ကျွန်တော်တို့ ရေးသား တင်ပြထားရခြင်းသည် ကျန်းမာရေး အတွက် သိထားနားလည် ထားသင့်သည် ဟုယူဆသော်ကြောင့်ဖြစ်ပါသည်.......
- ကျွန်တော်တို့၏ ဆောင်ပုဒ်သည်"ဘယ်အရာမဆို အားလုံးကို လုံးဝမတတ်ရင်နေ သိထား နားလည် ထားနိုင်ရင် ပိုကောင်းတယ်.." ဟု ဖြစ်ပါသည်..
ဧည့်သည်တော်များခင်ဗျာ
- အခုဖတ်မည့် Post သည် လိင်မှု ပိုင်းဆိုင် ရာများ ကိုရေးသားထားခြင်းဖြစ်ပါသည်......
- သို့သော်ကျွန်တော်တို့ ရေးသား တင်ပြထားရခြင်းသည် ကျန်းမာရေး အတွက် သိထားနားလည် ထားသင့်သည် ဟုယူဆသော်ကြောင့်ဖြစ်ပါသည်.......
- ကျွန်တော်တို့၏ ဆောင်ပုဒ်သည်"ဘယ်အရာမဆို အားလုံးကို လုံးဝမတတ်ရင်နေ သိထား နားလည် ထားနိုင်ရင် ပိုကောင်းတယ်.." ဟု ဖြစ်ပါသည်..
ဧည့်သည်တော်များခင်ဗျာ
- အခုဖတ်မည့် Post သည် လိင်မှု ပိုင်းဆိုင် ရာများ ကိုရေးသားထားခြင်းဖြစ်ပါသည်......
- သို့သော်ကျွန်တော်တို့ ရေးသား တင်ပြထားရခြင်းသည် ကျန်းမာရေး အတွက် သိထားနားလည် ထားသင့်သည် ဟုယူဆသော်ကြောင့်ဖြစ်ပါသည်.......
- ကျွန်တော်တို့၏ ဆောင်ပုဒ်သည်"ဘယ်အရာမဆို အားလုံးကို လုံးဝမတတ်ရင်နေ သိထား နားလည် ထားနိုင်ရင် ပိုကောင်းတယ်.." ဟု ဖြစ်ပါသည်..
ဧည့်သည်တော်များခင်ဗျာ
- အခုဖတ်မည့် Post သည် လိင်မှု ပိုင်းဆိုင် ရာများ ကိုရေးသားထားခြင်းဖြစ်ပါသည်......
- သို့သော်ကျွန်တော်တို့ ရေးသား တင်ပြထားရခြင်းသည် ကျန်းမာရေး အတွက် သိထားနားလည် ထားသင့်သည် ဟုယူဆသော်ကြောင့်ဖြစ်ပါသည်.......
- ကျွန်တော်တို့၏ ဆောင်ပုဒ်သည်"ဘယ်အရာမဆို အားလုံးကို လုံးဝမတတ်ရင်နေ သိထား နားလည် ထားနိုင်ရင် ပိုကောင်းတယ်.." ဟု ဖြစ်ပါသည်..
ဧည့်သည်တော်များခင်ဗျာ
- အခုဖတ်မည့် Post သည် လိင်မှု ပိုင်းဆိုင် ရာများ ကိုရေးသားထားခြင်းဖြစ်ပါသည်......
- သို့သော်ကျွန်တော်တို့ ရေးသား တင်ပြထားရခြင်းသည် ကျန်းမာရေး အတွက် သိထားနားလည် ထားသင့်သည် ဟုယူဆသော်ကြောင့်ဖြစ်ပါသည်.......
- ကျွန်တော်တို့၏ ဆောင်ပုဒ်သည်"ဘယ်အရာမဆို အားလုံးကို လုံးဝမတတ်ရင်နေ သိထား နားလည် ထားနိုင်ရင် ပိုကောင်းတယ်.." ဟု ဖြစ်ပါသည်..
ဧည့်သည်တော်များခင်ဗျာ
- အခုဖတ်မည့် Post သည် လိင်မှု ပိုင်းဆိုင် ရာများ ကိုရေးသားထားခြင်းဖြစ်ပါသည်......
- သို့သော်ကျွန်တော်တို့ ရေးသား တင်ပြထားရခြင်းသည် ကျန်းမာရေး အတွက် သိထားနားလည် ထားသင့်သည် ဟုယူဆသော်ကြောင့်ဖြစ်ပါသည်.......
- ကျွန်တော်တို့၏ ဆောင်ပုဒ်သည်"ဘယ်အရာမဆို အားလုံးကို လုံးဝမတတ်ရင်နေ သိထား နားလည် ထားနိုင်ရင် ပိုကောင်းတယ်.." ဟု ဖြစ်ပါသည်..
ဧည့်သည်တော်များခင်ဗျာ
- အခုဖတ်မည့် Post သည် လိင်မှု ပိုင်းဆိုင် ရာများ ကိုရေးသားထားခြင်းဖြစ်ပါသည်......
- သို့သော်ကျွန်တော်တို့ ရေးသား တင်ပြထားရခြင်းသည် ကျန်းမာရေး အတွက် သိထားနားလည် ထားသင့်သည် ဟုယူဆသော်ကြောင့်ဖြစ်ပါသည်.......
- ကျွန်တော်တို့၏ ဆောင်ပုဒ်သည်"ဘယ်အရာမဆို အားလုံးကို လုံးဝမတတ်ရင်နေ သိထား နားလည် ထားနိုင်ရင် ပိုကောင်းတယ်.." ဟု ဖြစ်ပါသည်..
ဧည့်သည်တော်များခင်ဗျာ
- အခုဖတ်မည့် Post သည် လိင်မှု ပိုင်းဆိုင် ရာများ ကိုရေးသားထားခြင်းဖြစ်ပါသည်......
- သို့သော်ကျွန်တော်တို့ ရေးသား တင်ပြထားရခြင်းသည် ကျန်းမာရေး အတွက် သိထားနားလည် ထားသင့်သည် ဟုယူဆသော်ကြောင့်ဖြစ်ပါသည်.......
- ကျွန်တော်တို့၏ ဆောင်ပုဒ်သည်"ဘယ်အရာမဆို အားလုံးကို လုံးဝမတတ်ရင်နေ သိထား နားလည် ထားနိုင်ရင် ပိုကောင်းတယ်.." ဟု ဖြစ်ပါသည်..
ဧည့်သည်တော်များခင်ဗျာ
- အခုဖတ်မည့် Post သည် လိင်မှု ပိုင်းဆိုင် ရာများ ကိုရေးသားထားခြင်းဖြစ်ပါသည်......
- သို့သော်ကျွန်တော်တို့ ရေးသား တင်ပြထားရခြင်းသည် ကျန်းမာရေး အတွက် သိထားနားလည် ထားသင့်သည် ဟုယူဆသော်ကြောင့်ဖြစ်ပါသည်.......
- ကျွန်တော်တို့၏ ဆောင်ပုဒ်သည်"ဘယ်အရာမဆို အားလုံးကို လုံးဝမတတ်ရင်နေ သိထား နားလည် ထားနိုင်ရင် ပိုကောင်းတယ်.." ဟု ဖြစ်ပါသည်..
ဧည့်သည်တော်များခင်ဗျာ
- အခုဖတ်မည့် Post သည် လိင်မှု ပိုင်းဆိုင် ရာများ ကိုရေးသားထားခြင်းဖြစ်ပါသည်......
- သို့သော်ကျွန်တော်တို့ ရေးသား တင်ပြထားရခြင်းသည် ကျန်းမာရေး အတွက် သိထားနားလည် ထားသင့်သည် ဟုယူဆသော်ကြောင့်ဖြစ်ပါသည်.......
- ကျွန်တော်တို့၏ ဆောင်ပုဒ်သည်"ဘယ်အရာမဆို အားလုံးကို လုံးဝမတတ်ရင်နေ သိထား နားလည် ထားနိုင်ရင် ပိုကောင်းတယ်.." ဟု ဖြစ်ပါသည်..
ဧည့်သည်တော်များခင်ဗျာ
- အခုဖတ်မည့် Post သည် လိင်မှု ပိုင်းဆိုင် ရာများ ကိုရေးသားထားခြင်းဖြစ်ပါသည်......
- သို့သော်ကျွန်တော်တို့ ရေးသား တင်ပြထားရခြင်းသည် ကျန်းမာရေး အတွက် သိထားနားလည် ထားသင့်သည် ဟုယူဆသော်ကြောင့်ဖြစ်ပါသည်.......
- ကျွန်တော်တို့၏ ဆောင်ပုဒ်သည်"ဘယ်အရာမဆို အားလုံးကို လုံးဝမတတ်ရင်နေ သိထား နားလည် ထားနိုင်ရင် ပိုကောင်းတယ်.." ဟု ဖြစ်ပါသည်..
ဧည့်သည်တော်များခင်ဗျာ
- အခုဖတ်မည့် Post သည် လိင်မှု ပိုင်းဆိုင် ရာများ ကိုရေးသားထားခြင်းဖြစ်ပါသည်......
- သို့သော်ကျွန်တော်တို့ ရေးသား တင်ပြထားရခြင်းသည် ကျန်းမာရေး အတွက် သိထားနားလည် ထားသင့်သည် ဟုယူဆသော်ကြောင့်ဖြစ်ပါသည်.......
- ကျွန်တော်တို့၏ ဆောင်ပုဒ်သည်"ဘယ်အရာမဆို အားလုံးကို လုံးဝမတတ်ရင်နေ သိထား နားလည် ထားနိုင်ရင် ပိုကောင်းတယ်.." ဟု ဖြစ်ပါသည်..
ဧည့်သည်တော်များခင်ဗျာ
- အခုဖတ်မည့် Post သည် လိင်မှု ပိုင်းဆိုင် ရာများ ကိုရေးသားထားခြင်းဖြစ်ပါသည်......
- သို့သော်ကျွန်တော်တို့ ရေးသား တင်ပြထားရခြင်းသည် ကျန်းမာရေး အတွက် သိထားနားလည် ထားသင့်သည် ဟုယူဆသော်ကြောင့်ဖြစ်ပါသည်.......
- ကျွန်တော်တို့၏ ဆောင်ပုဒ်သည်"ဘယ်အရာမဆို အားလုံးကို လုံးဝမတတ်ရင်နေ သိထား နားလည် ထားနိုင်ရင် ပိုကောင်းတယ်.." ဟု ဖြစ်ပါသည်..
ဧည့်သည်တော်များခင်ဗျာ
- အခုဖတ်မည့် Post သည် လိင်မှု ပိုင်းဆိုင် ရာများ ကိုရေးသားထားခြင်းဖြစ်ပါသည်......
- သို့သော်ကျွန်တော်တို့ ရေးသား တင်ပြထားရခြင်းသည် ကျန်းမာရေး အတွက် သိထားနားလည် ထားသင့်သည် ဟုယူဆသော်ကြောင့်ဖြစ်ပါသည်.......
- ကျွန်တော်တို့၏ ဆောင်ပုဒ်သည်"ဘယ်အရာမဆို အားလုံးကို လုံးဝမတတ်ရင်နေ သိထား နားလည် ထားနိုင်ရင် ပိုကောင်းတယ်.." ဟု ဖြစ်ပါသည်..
ဧည့်သည်တော်များခင်ဗျာ
- အခုဖတ်မည့် Post သည် လိင်မှု ပိုင်းဆိုင် ရာများ ကိုရေးသားထားခြင်းဖြစ်ပါသည်......
- သို့သော်ကျွန်တော်တို့ ရေးသား တင်ပြထားရခြင်းသည် ကျန်းမာရေး အတွက် သိထားနားလည် ထားသင့်သည် ဟုယူဆသော်ကြောင့်ဖြစ်ပါသည်.......
- ကျွန်တော်တို့၏ ဆောင်ပုဒ်သည်"ဘယ်အရာမဆို အားလုံးကို လုံးဝမတတ်ရင်နေ သိထား နားလည် ထားနိုင်ရင် ပိုကောင်းတယ်.." ဟု ဖြစ်ပါသည်..
ဧည့်သည်တော်များခင်ဗျာ
- အခုဖတ်မည့် Post သည် လိင်မှု ပိုင်းဆိုင် ရာများ ကိုရေးသားထားခြင်းဖြစ်ပါသည်......
- သို့သော်ကျွန်တော်တို့ ရေးသား တင်ပြထားရခြင်းသည် ကျန်းမာရေး အတွက် သိထားနားလည် ထားသင့်သည် ဟုယူဆသော်ကြောင့်ဖြစ်ပါသည်.......
- ကျွန်တော်တို့၏ ဆောင်ပုဒ်သည်"ဘယ်အရာမဆို အားလုံးကို လုံးဝမတတ်ရင်နေ သိထား နားလည် ထားနိုင်ရင် ပိုကောင်းတယ်.." ဟု ဖြစ်ပါသည်..
ဧည့်သည်တော်များခင်ဗျာ
- အခုဖတ်မည့် Post သည် လိင်မှု ပိုင်းဆိုင် ရာများ ကိုရေးသားထားခြင်းဖြစ်ပါသည်......
- သို့သော်ကျွန်တော်တို့ ရေးသား တင်ပြထားရခြင်းသည် ကျန်းမာရေး အတွက် သိထားနားလည် ထားသင့်သည် ဟုယူဆသော်ကြောင့်ဖြစ်ပါသည်.......
- ကျွန်တော်တို့၏ ဆောင်ပုဒ်သည်"ဘယ်အရာမဆို အားလုံးကို လုံးဝမတတ်ရင်နေ သိထား နားလည် ထားနိုင်ရင် ပိုကောင်းတယ်.." ဟု ဖြစ်ပါသည်..
ဧည့်သည်တော်များခင်ဗျာ
- အခုဖတ်မည့် Post သည် လိင်မှု ပိုင်းဆိုင် ရာများ ကိုရေးသားထားခြင်းဖြစ်ပါသည်......
- သို့သော်ကျွန်တော်တို့ ရေးသား တင်ပြထားရခြင်းသည် ကျန်းမာရေး အတွက် သိထားနားလည် ထားသင့်သည် ဟုယူဆသော်ကြောင့်ဖြစ်ပါသည်.......
- ကျွန်တော်တို့၏ ဆောင်ပုဒ်သည်"ဘယ်အရာမဆို အားလုံးကို လုံးဝမတတ်ရင်နေ သိထား နားလည် ထားနိုင်ရင် ပိုကောင်းတယ်.." ဟု ဖြစ်ပါသည်..

