ကိုကြီးဇော် ( မုန်တိုင်း )

ဗဟုသုတဘဏ်

this site the web

549..Password Checker


အေပၚပံုမွာျမင္ရသလိုBest ျဖစ္ေနရင္အေကာင္းဆံုးပါ....

မိမိရဲ့password ဟာ သံုးစြဲသူဦးေရအနည္းအမ်ားနဲ့website ေတြကို၀င္ေရာက္မွူအ

ၾကိမ္အရည္အတြက္ကိုသာတြက္ခ်က္စစ္ေဆးတာမ်ိဳးသက္သက္ပါ...


http://www.microsoft.com/protect/fraud/passwords/checker.aspx

Labels: , , ,

Print ပဲထုပ်ပါ..pdf ထုပ်လျှင်.ဖောင့်လွဲနေလိမ့်မယ်


မာတိကာ ၁ မာတိကာ ၂ မာတိကာ ၃ မာတိကာ ၄ မာတိကာ ၅
0 comments

548..How to Navigate Inside the Registry

 
1. First open 'Run' by clicking on 'Start' and selecting 'Run'.

2. Type 'regedit' in the textbox as shown in the figure and click 'OK'.

Photobucket


3. You'll get a window like the one shown below.

Photobucket


Now observe the registry path for deleting the 'IsShorcut' value. Its 'HKEY_CLASSES_ROOT-->lnkfile'

Now we will break that path into 2 parts namely 'HKEY_CLASSES_ROOT' and 'lnkfile'

So now lets being navigating through the registry. Let us take the first part of the path (HKEY_CLASSES_ROOT).

4. So just double click 'HKEY_CLASSES_ROOT' and you can see a number of entries under it as shown in the figure.

Photobucket


5. Scroll down till you reach 'lnkfile'.

Photobucket


6. Now simply double click on 'lnkfile' and observe the right hand side of the window. You will see 'IsShortcut' listed under 'Name' column. Right click it and select 'Delete'.

Photobucket


7. You'll get a confirmation dialogue box. Click 'Yes'.

Photobucket


8. Close registry and restart your system. You'll no longer see the shorcut arrow on icons after the restart.


Note : No matter what the path is, the method would be the same. Suppose the registry path is 'HKEY_LOCAL_MACHINE-->Software-->Microsoft-->Current Version', start by double clicking on 'HKEY_LOCAL_MACHINE'. Then scroll down and double click 'Software'. Scroll down again and double click 'Microsoft' and so on.


Labels: ,

Print ပဲထုပ်ပါ..pdf ထုပ်လျှင်.ဖောင့်လွဲနေလိမ့်မယ်


မာတိကာ ၁ မာတိကာ ၂ မာတိကာ ၃ မာတိကာ ၄ မာတိကာ ၅
0 comments

547..How to remove startup programs in Windows


How to remove startup programs in Windows

I guess this is far away from a new subject but I am writting this article since most of the articles focused on this subject are incomplete and needs some improvements. So, you want to know if you can disable or remove a program from your startup. With other words, when you're starting Windows, some applications starts right away even if you don't intend to use them. It's pretty annoying and it slows down your computer. I am going to show you how to stop a program from launching itself when Windows will start. This should work for both Windows XP and Vista. First thing to do is to open the "Run" window, to do so you need to click on the "Start" button.

To access the "Run" window you need to click on the "Start" button

Make sure to click on the "Run" window and you should see a new small window that asks you to type something in it. If anything else is written there, make sure to delete it and type "msconfig" without quotes and press "OK" button. Type the same thing that you're seeing in the following picture :

Make sure to type "msconfig" in this window

You should now see another window called "System Configuration Utility". By default this new window should open under the "General" tab but you will need to click on "Startup" tab and you should see a similar picture with this one:

System Configuration Utility window opened in Windows XP

In this window we need to look at "Startup Item", and we need to identify the program that we want to disable it. For example, I found very annoying the Veoh Web Player that starts each time I start my Windows, asking me for my username and password. So I want to start it manually since I am not using it each time I am starting my computer. Now, if I want to disable Veoh Web Player from starting automatically, all I need to do is to uncheck the corresponding white box. After this all we need to do is to click on "Apply" button. If it's unchecked it should look like in the following picture :

Make sure to uncheck the corresponding box if you want to disable a program from Windows startup

Now, after you clicked on the "Apply" button, you must click on the "Close" button. Look at the following picture :

Press "Close" button to close System Configuration Utility

Here comes a part that will become very annoying and will make you think that using System Configuration Utility was useless. After you will click on "Close" button, a new small window will appear asking you to "Restart" or "Exit Without Restart". I am recommending you to use "Restart" ( make sure to read the entire article first ).

System Configuration

Supposing that your computer has been restarted ( make sure to save your work ), the application that you unchecked should no longer appear and it should start only if you want it, by opening manually. Now you should see a System Configuration Utility window saying that : "You have used the System Configuration Utility to make changes to the way Windows starts" and you will need to MAKE SURE TO CHECK THE LITTLE BOX THAT SAYS "Don't show this message or launch the System Configuration Utility when Windows start". So, your window should look like the one in the following picture, just make sure to click on "OK" button and the window will close and it won't appear next time when you will start Windows.

Make sure to check this little box : "Don't show this message or launch the System Configuration Utility when Windows start"

And that's it, if you want to disable another program from Windows startup, you need to repeat this procedure. Remember that I disabled only one program, but you can disable more of them. Also make sure to disable only the programs that you don't need them to start automatically, do not disable programs that are being used by your system. If you suspect that a program might be a malware, you should scan your system with your antivirus or a free anti-spyware application like Ad-Aware or Spybot Search & Destroy. Also, if you cannot remove a program from your startup list and you know for sure that is a malware you can use Hijack This. This program will show you everything that runs on your computer and also hidden startups allowing you to stop them. However, you need to understand security issues when using this software.


Labels: ,

Print ပဲထုပ်ပါ..pdf ထုပ်လျှင်.ဖောင့်လွဲနေလိမ့်မယ်


မာတိကာ ၁ မာတိကာ ၂ မာတိကာ ၃ မာတိကာ ၄ မာတိကာ ၅
0 comments

546..Desktop ေပၚမွ icons ေလးေတြက Arrow ေလးေတြကိုေဖ်ာက္ခ်င္ရင္..

 
Desktop ေပၚမွ icons ေလးေတြက Arrow ေလးေတြကိုေဖ်ာက္ခ်င္ရင္...

Image and video hosting by TinyPic


1. Go to Start-->Run 'regedit' (without quotes)
OK. ေျပာ...

2. Navigate to 'HKEY_CLASSES_ROOT-->lnkfile'.

3. the value IsShorcut registry value. ကို delect လုပ္

4. system ကို Restart ခ်ပါက ေအာက္က ပံုေလးလိုArrow မပါေတာ့တာေတြ့ရမယ္....

Image and video hosting by TinyPic


Labels: ,

Print ပဲထုပ်ပါ..pdf ထုပ်လျှင်.ဖောင့်လွဲနေလိမ့်မယ်


မာတိကာ ၁ မာတိကာ ၂ မာတိကာ ၃ မာတိကာ ၄ မာတိကာ ၅
0 comments

511..စြန့္ပစ္ပစၥည္းဘယ္လိုအသံုးခ်ရမလဲတတ္ခ်င္ရင္


စြန့္ပစ္ပစၥည္းအမ်ိဳးမ်ိဳးကို အက်ိဳးရွိစြာ ဘယ္လိုအသံုးခ်ရမလဲဆိုတာသိခ်င္..တတ္ခ်င္ရင္

ဒီဆိုဒ္

ကသင့္ကို နည္းလမ္းေတြျပေပးရင္ သင္အတြက္အလြန္ပဲအက်ိဳးရွိပါလိမ့္မယ္....

Labels: , ,

Print ပဲထုပ်ပါ..pdf ထုပ်လျှင်.ဖောင့်လွဲနေလိမ့်မယ်


မာတိကာ ၁ မာတိကာ ၂ မာတိကာ ၃ မာတိကာ ၄ မာတိကာ ၅
0 comments

477..window short-cuts key မ်ား

 
Shortcut KeysDescription
Alt + FFile menu options in current program.
Alt + EEdit options in current program
F1Universal Help in almost every Windows program.
Ctrl + ASelect all text.
Ctrl + XCut selected item.
Shift + DelCut selected item.
Ctrl + CCopy selected item.
Ctrl + InsCopy selected item
Ctrl + VPaste
Shift + InsPaste
HomeGoes to beginning of current line.
Ctrl + HomeGoes to beginning of document.
EndGoes to end of current line.
Ctrl + EndGoes to end of document.
Shift + HomeHighlights from current position to beginning of line.
Shift + EndHighlights from current position to end of line.
Ctrl + Left arrowMoves one word to the left at a time.
Ctrl + Right arrow Moves one word to the right at a time.


Working with Word

To...

Use this shortcut

Select text

Shift + Right Arrow, Left Arrow, Up Arrow, or Down Arrow to highlight text

Copy selected text

Ctrl + C

Cut selected text

Ctrl + X

Paste selected text

Ctrl + V

Undo your last action

Ctrl + Z

Select all the text within your document

Ctrl + A

Bold text

Ctrl + B

Italicize text

Ctrl + I

Underline

Ctrl + U

Decrease font size

Ctrl + Shift + <

Increase font size

Ctrl + Shift + >

Change font

Ctrl + Shift + F, then use the arrow keys to reach the new font

Change font size

Ctrl + Shift + P, then use the arrow keys to reach the new font size

Create page break

Ctrl + Enter

Create new document

Ctrl + N

Open My Documents window

Ctrl + O

Close a document

Ctrl + W

Save a document

Ctrl + S

Print a document

Ctrl + P

Preview what you're about to print

Alt + Ctrl + I

Accelerating Excel

To...

Use this shortcut

Move right to left, cell by cell

Tab

Move up and down, cell by cell

Enter

Erase data in current cell

Backspace

Return to the beginning of the row

Home

Enter the date

Ctrl + ; (semicolon)

Enter the time

Ctrl + Shift + : (colon)

Start a formula

= (equal sign)

Check the spelling of titles or words within the cells

F7

Find out about the style within the cell

ALT + ' (apostrophe)

Display the Format Cells dialog box

Ctrl + 1

Apply the general number format

Ctrl + Shift + ~

Turn numbers into dollars

Ctrl + Shift + $

Make numbers a percentage

Ctrl + Shift + %

Apply a border

Ctrl + Shift + &


General keyboard shortcuts

  • CTRL+C (Copy)
  • CTRL+X (Cut)
  • CTRL+V (Paste)
  • CTRL+Z (Undo)
  • DELETE (Delete)
  • SHIFT+DELETE (Delete the selected item permanently without placing the item in the Recycle Bin)
  • CTRL while dragging an item (Copy the selected item)
  • CTRL+SHIFT while dragging an item (Create a shortcut to the selected item)
  • F2 key (Rename the selected item)
  • CTRL+RIGHT ARROW (Move the insertion point to the beginning of the next word)
  • CTRL+LEFT ARROW (Move the insertion point to the beginning of the previous word)
  • CTRL+DOWN ARROW (Move the insertion point to the beginning of the next paragraph)
  • CTRL+UP ARROW (Move the insertion point to the beginning of the previous paragraph)
  • CTRL+SHIFT with any of the arrow keys (Highlight a block of text)
  • SHIFT with any of the arrow keys (Select more than one item in a window or on the desktop, or select text in a document)
  • CTRL+A (Select all)
  • F3 key (Search for a file or a folder)
  • ALT+ENTER (View the properties for the selected item)
  • ALT+F4 (Close the active item, or quit the active program)
  • ALT+ENTER (Display the properties of the selected object)
  • ALT+SPACEBAR (Open the shortcut menu for the active window)
  • CTRL+F4 (Close the active document in programs that enable you to have multiple documents open simultaneously)
  • ALT+TAB (Switch between the open items)
  • ALT+ESC (Cycle through items in the order that they had been opened)
  • F6 key (Cycle through the screen elements in a window or on the desktop)
  • F4 key (Display the Address bar list in My Computer or Windows Explorer)
  • SHIFT+F10 (Display the shortcut menu for the selected item)
  • ALT+SPACEBAR (Display the System menu for the active window)
  • CTRL+ESC (Display the Start menu)
  • ALT+Underlined letter in a menu name (Display the corresponding menu)
  • Underlined letter in a command name on an open menu (Perform the corresponding command)
  • F10 key (Activate the menu bar in the active program)
  • RIGHT ARROW (Open the next menu to the right, or open a submenu)
  • LEFT ARROW (Open the next menu to the left, or close a submenu)
  • F5 key (Update the active window)
  • BACKSPACE (View the folder one level up in My Computer or Windows Explorer)
  • ESC (Cancel the current task)
  • SHIFT when you insert a CD-ROM into the CD-ROM drive (Prevent the CD-ROM from automatically playing)
  • CTRL+SHIFT+ESC (Open Task Manager)


**Start + M - ဖြင့္ထားတဲ့ windows ေတြက ခ်ံဳ႕ျပီး
tast bar ေပၚမွာ ေနရာ ခ်ေပး ပါလိမ့္မယ္။

**Start + Shift + M - task bar ေပၚမွာခ်ံဳ႕ျပီး ခဏ ေနရာ
ခ်ထားတဲ့ windows ေတြကုိ size ၾကီး ျပန္ခ်ဲ႕ေပးပါတယ္။

**Start + E - Windows ရဲ႕ windows explorer ကို ဖြင့္ေပး ပါတယ္။

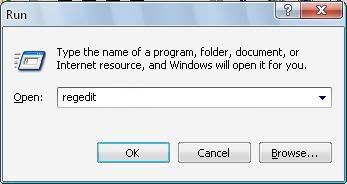
**Start + R - Start menu မွာရွိတဲ့ ‘Run’ box ကို ဖြင့္ ေပးပါတယ္။

**Start + F - windows search dialog box ကုိ ဖြင့္ ေပးပါတယ္။

**Start + Ctrl + F - search box ကုိဖြင့္ ေပးပါတယ္..
computer ဟာ network ခ်ိတ္ဆက္ ထားရင္
computer dialog box ကို ဖြင့္ေပး ပါတယ္။

**Start + Pause ( Break ) - Systerm properties dialog box
ကုိ ဖြင့္ေပး ပါတယ္။

**F1 - အကူအညီ တစ္စံု တစ္ရာ လုိအပ္ရန္ နွိပ္ပါ။

**Ctrl + Esc - Start Menu ကုိ ဖြင့္ေပး ပါတယ္။

**Alt + Tab - ဖြင့္ထားတဲ့ ပရုိဂရမ္ေတြ တစ္ခုနဲ႕
တစ္ခု အၾကားကုိ ကူးေျပာင္း အလုပ္လုပ္ ေစနုိင္ ပါတယ္။

**Alt + F4 - ဖြင့္္ ထားတဲ့ ပရုိဂရမ္ ကေန ထြက္ခြာ ေစပါတယ္။
အလုပ္ လုပ္လ်က္ သား ျဖစ္ ေနရင္ save လုပ္ မလားလုိ႕ ေမးပါ လိမ့္မယ္။

ွ့ွ**Shift + Del - select ေပးျပီး ေရြးခ်ယ္ ထားတဲ့ ဖုိင္တစ္ခုကုိ
အျပီးတုိင္ ဖ်က္ဆီး ပစ္ပါလိမ့္မယ္။

**Windows program key combination
**Ctrl + C - မိတၱဴ ပြားေပး ပါမယ္။

**Ctrl + X - တစ္ေနရာမွ တစ္ေနရာကုိ ကူးေျပာင္း ေနရာ ေရႊ႕ဖုိ႕
အတြက္ အဆင္သင့္ ျဖစ္ေနျပီ ျဖစ္္တဲ့ လုပ္ငန္းစဥ္ပါ။

**Ctrl + past - မိတၱဴပြားျပီးသား ဖုိင္တစ္ခုကုိ ျပန္လည္ ေနရာ ခ်ထား ေပးပါတယ္။

**Ctrl + Z - undo. လုပ္ေဆာင္ ခဲ့ေသာ အလုပ္ကုိ မနွစ္ သက္တဲ့ အခါမွာ
မူလ အေျခအေန အတုိင္း ျပန္ေရာက္ ရွိေစပါတယ္။

**Ctrl +B - document အတြင္းမွာရွိတဲ့ tast ေတြကုိ ပိုမုိ ထင္ရွား ေအာင္ ျပဳလုပ္ ေပးပါတယ္။

**Ctrl + U - document အတြင္းမွာရွိတဲ့ tast ေအာက္ေျခမွာ မ်ဥ္းသား လုိတဲ့အခါ သံုးၾကပါတယ္။

**Ctrl + I - Italic- text ေတြကို ေစာင္းေပးပါတယ္။

**Mouse/ Keyboard Modifier
**Shift + right click (တစ္ခ်က္) - Rice click နဲ႕တူတယ္။ active windows ရဲ႕ display menu ကုိ ဖြင့္ေပးတယ္။

**ွွShift + Left Click (နွစ္ခ်က္)

**Alt + Left Click (နွစ္ခ်က္) - ဖုိင္သုိ႕မဟုတ္ folder ရဲ႕ properties ကုိျပေပးမယ္။

**General Keyboard
**F 10 - mune bar မွာရွိတဲ့ options ေတြကို အဆင္သင့္ ျဖစ္ေနေအာင္ လုပ္ေဆာင္ ေပးပါတယ္။

**Ctrl + Esc - Start Menu ကုိဖြင့္ေပးပါတယ္။

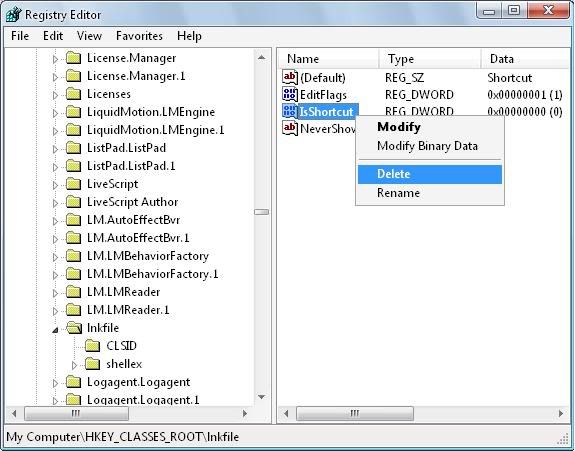
**Shift + F 10 - ေရြးခ်ယ္ထားတဲ့ဖုိင္ တစ္ခုအတြက္ ’short-cut’ ဖုိင္ငယ္ေလး တစ္ခု ျပဳလုပ္ ေပးထား ပါတယ္။

**Alt + down arrow - drop-down list box က်လာေစပါတယ္။ ေဆာ့ဖ္ဝဲတစ္ခု အတြင္းမွာပဲျဖစ္ေစ၊ တစ္ျခား တစ္ေနရာ တစ္ခု မွာပဲျဖစ္ေစ features တုိင္း လုပ္ေဆာင္ နုိင္စြမ္း box ငယ္ကေလးမ်ား ကုိယ္စီ ရွိၾကသည္။

**Alt + Tab - ဖြင့္ထားတဲ့လုပ္ငန္းစဥ္တုိင္းအား တစ္ခုနွင့္တစ္ခု အၾကား ကူးေျပာင္း ေစနုိင္ပါတယ္။
** Alt Key ကုိဖိထားျပီး Tab Key ကုိ လြတ္လုိက္မယ္ ဆုိရင္ လုပ္ေဆာင္ဆဲ လုပ္ငန္းစဥ္ မွန္သမွ်ကုိ အလြယ္တကူ ၾကည့္ရွု နုိင္ျပီး လုပ္ငန္း ေျပာင္းလဲ နုိင္ပါတယ္။

**Shift + ? - တကယ္လုိ႕ shift key ကုိဖိနွိပ္ထားျပီး CD-ROM ဒါမွမဟုတ္ DVD တစ္ခ်က္ကုိ ထည့္သြင္း လုိက္မယ္ ဆုိရင္ အဲဒီ CD/DVD ရဲ႕ ‘Auto Run’ box တက္လာ ပါမယ္။ CD မွာ virus ပါဝင္ လာမႈရွိ၊ မရွိ စစ္ေဆး လုိတဲ့အခါမွာ အသုံးဝင္ပါတယ္။

**Alt + Space - Restore, move, size, minimize, maximize စတဲ့ command ေတြပါ ဝင္တဲ့ system restore box ကုိျပ ေပးတယ္။

**Alt + hypen - Multiple Document Interface ကုိ ျပသ ေပးတယ္။

**Alt + underlined letter - ေဆာ့ဖ္ဝဲတစ္ခုအတြင္းမွာ သတိထားၾကည့္မိရင္ options bar ရဲ႕ feature ေတြမွာ မ်ဥ္းသား ထားတဲ့ စာသား ေလးေတြ မ်ိဳးစံု ေတြ႕ရ ပါလိမ့္မယ္။ Alt ကုိ ဖိနွိပ္ ထားျပီး အခုန စာသား ေလးကို နွိပ္လုိက္တ့ဲ့ အခါမွာ အဲဒီ ‘feature’ ရဲ႕’drop down box’ ( = ပါဝင္တဲ့ လုပ္ေဆာင္ ခ်က္ေတြ ) ပြင့္လာ ပါမယ္။

**Ctrl + F4 - address bar ကုိဖြင့္ေပးတယ္။

**Alt + F6 - Alt + Tab အလုပ္လုပ္ပံု အတုိင္းျဖစ္ပါတယ္။

Selected objects & shell objects
**F2 - ေရြးခ်ယ္ထားတဲ့အရာဝတၱဳကုိ နာမည္အသစ္ ျပန္ေပးဖုိ႕ အဆင္သင့္ ျဖစ္ေန ေစပါမယ္။

**F3 - ဖုိင္ေတြအကုန္လုံးကုိ ရွာေမးမယ္။

**Alt + Enter - ေရြးခ်ယ္ထားတဲ့ အရာဝတၱဳရဲ႕ properties’ ကုိ ေဖာ္ျပ ေပးပါတယ္။

**ဖုိင္တစ္ခုမိတၱဴပြားရန္ - Ctrl Key ကုိနွိပ္ထားျပီး အဲဒီဖုိင္ကုိ မတူညီတဲ့ တျခား ေနရာကုိ ေရႊ႕ေပးပါတယ္။ အေပါင္း လကၡဏာ ေပၚလာျပီး မိတၱဴပြား ေပးပါလိမ့္မယ္။

**Shortcut တစ္ခုဖန္တီးရန္ - Ctrl နဲ႕ Shift Key ေတြကုိ ဖိနွိပ္ထားရင္ ဖန္တီးခ်င္တဲ့ folder ဒါမွမဟုတ္ အရာဝတၱဳကုိ ဖန္တီးလုိတဲ့ ေနရာဆီကို drag ဆြဲယူပါ။

**F4 - object ကုိ select ေပးထားရင္းနဲ႕ F4 ကုိ နွိပ္ရင္ address bar ကုိ ဖြင့္ေပးပါတယ္။

General folder/shortcut control
**F5(Refresh) - လုပ္ေဆာင္ေနတဲ့ အလုပ္ေတြကို ျပန္လည္ လန္းဆန္း ေစပါ။

**F6 - Windows Explorer အတြင္းဟိုဘက္ ဒီဘက္ cursor ေရႊ႕နုိင္ ပါတယ္။

**Ctrl + A - အရာဝတၱဳမ်ားအားလံုးကုိ select လုပ္ေပးပါမယ္။ တကယ္လုိ႕ desktop ေပၚမွာ item တစ္ခု ကုိ click နွိပ္ျပီး ‘Ctrl + A’ command သံုးလုိက္ရင္ က်န္တဲ့ item ေတြကုိပါ ေရြးခ်ယ္ ျပီးသား ျဖစ္သြား ပါလိမ့္မယ္။

Shift + Click + closebutton - ဖြင့္ထားတဲ့ folder ေတြမွန္သမွ် parten folder ကုိေရာ root folder ေတြေရာ ပိတ္ေပးသည္။

Windows explorer အတြင္း
*(keypad) - ရွိရွိသမွ် root folder ေတြအကုန္ဖြင့္ေပးတယ္။

+(keypad) - root floder တခုအတြင္းရွိ ရွိရွိသမွ် file ေတြဖြင့္ေပးတယ္။

-(keypad) - root flolder တခုအတြင္းရွိ ရွိရွိသမွ် file ေတြပိတ္ေပးတယ္။

Right Arrow - ‘+’ နဲ႔အလုပ္လုပ္ပံုခ်င္းတူတယ္။

Left Arrow - ‘-’ နဲ႔အလုပ္လုပ္ပံုခ်င္းတူတယ္။

Properties control
Ctrl + Tab သို႔မဟုတ္ Ctrl + Tab + Shift - Mouse မသံုးဘဲဲ Keyboard နဲ႔ခုန္ပ်ံေက်ာ္လႊားသြား နိုင္ တယ္။ (Mouse အသံုးမျပဳလိုပါက mouse properties တခ်ိဳ႔ကို disable လုပ္ထားလွ်င္ ပိုေကာင္း၏။)

Accessibliity Short-cuts
Shift ကိုငါးႀကိမ္ႏွိပ္တဲ့အခါ - Control panel ထဲမွာရွိတဲ့ Accessibility options ကို select ေပးပါ။ Shift ကို PC ထဲကေန ‘ကြိ’ ဆိုတဲ့ အသံကေလး ေပၚလာ ပါလိမ့္မယ္။ ျပီးရင္ေတာ့ Shift Key ကိို save မလုပ္ ခ်င္ရင္ cancel လုပ္ပါ။

ညာဘက္ Shift ကို ရွစ္စကၠန္႔အႀကာ ဖိထားတဲ့အခါမွာ - ညာဘက္ Shift ကို ရွစ္စကၠန္႔ ႀကာေအာင္ ကိုင္ႏွိပ္ ထားရင္ filter key box ေလး ေပၚလာ ပါလိမ့္မယ္။

‘Number Lock’ Key ကိုငါးစကၠန္႔ႀကာ ေအာင္ဖိထားတဲ့အခါမွာ - Number lock Key ကိုငါးစကၠန္႔ ႀကာ ေအာင္ ဖိထားတဲ့အခါမွာလည္း ထိုနည္း လည္းေကာင္းပါပဲ၊ အလုပ္ လုပ္ပံု ခ်င္းသာ ကြဲျပား သြားမွာပါ။

ဘယ္ဘက္ Alt + ဘယ္ဘက္ Shift =+ Number Lock - PC ထဲက’ကြိ’ အသံေလးအတြက္ function ပဲျဖစ္ပါတယ္။ အဓိ္ကအားျဖင့္ကေတာ့ mouse key ေတြကို အပိတ္အဖြင့္ လုပ္ေစခ်င္တာပါ။

ဘယ္ဘက္ Alt + ဘယ္ဘက္ Shift + print screen preview - ျမင့္မားတဲ့ ပံုရိပ္ေတြကို ရယူလိုတဲ့ အခါမွာ အဆိုပါ keyboard တြဲေတြကို တြဲဘက္ ႏွွိပ္ေပး ရပါလိမ့္မယ္။

Keyboard Keys
Start (Windows logo) + D - Window ေတြကို task bar ေပၚကိုခဏ တင္ေပးတယ္။

Ctrl + Start + F - Search box ကိုဖြင့္ေပးပါမယ္။ ေခြးေလးကို မလိုခ်င္ရင္ ပယ္ဖ်က္ ထားလို႔ရပါတယ္။

Ctrl + Start + Tab - address bar ဆီကို ခ်က္ခ်င္း cursor ခ်ေပးတယ္။

Start + Tab - Taskbar ေပၚမွာစုျပံဳ ျပီး ဖြင့္ထားတဲ့ folder ေတြဆီကို တခုကေန တခု ကူးေျပာင္းႏိုင္တယ္။

Start + Pause (Break) - System properties ကိုခ်က္ခ်င္း ဖြင့္ေပးတယ္။

Application Key - File သိုမဟုတ္ folder ရဲ႔ properties ကိုဖြင့္ေပးတယ္။

Dialog box command
Tab - dialog box ထဲမွာဆိုရင္ ေနာက္တခုကို သြားဘို႔ အဆင္သင့္ ျဖစ္ေနတယ္။

Shift + Tab - လာခဲ့တဲ့ control ဆီကို ျပန္သြားေပးတယ္။

Space-bar - ေရြးခ်ယ္ျပီးလုပ္မယ္။ ( ဥပမုာ button တခုကို ေရြးထားတယ္။ အဲဒီ button ကို click ႏွိပ္ရံုပါပဲ။ ဥပမာ check box တခုကို ေရြးမယ္ဆိုရင္ space bar တခ်က္ပုတ္ရံုပဲ။ ဥပမာ ႏွစ္ခု ျပေပး ထားတယ္။ တခုကို ေရြးမယ္ ဆိုတဲ့ ေနရာမွာ Enter နဲ႔တူတယ္။

Esc - အရာအားလံုးရဲ႔ ၉၀ရာခိုင္ႏႉန္းဟာ ‘cancel’ ရဲ႔ အလုပ္ လုပ္ပံုနဲ႔ တူတယ္။

Alt + Underline Letter - Alt ကို ဖိထားျပီး underline သားထားတဲ့ အကၡရာကို ႏွိပ္မယ္ဆိုရင္ အဲဒီ command အတြက္ short-cut တခုပါပဲ။

Enter - object တခုကို select ေပးျပီး OK button ႏွိပ္လိုက္တာနဲ႔ ဆင္တူတယ္။


Labels: ,

Print ပဲထုပ်ပါ..pdf ထုပ်လျှင်.ဖောင့်လွဲနေလိမ့်မယ်


မာတိကာ ၁ မာတိကာ ၂ မာတိကာ ၃ မာတိကာ ၄ မာတိကာ ၅
0 comments

471..အင္တာနက္ကို၂၀%ျမန္ေအာင္လုပ္နည္း..

 
** Start Menu--->> Run
**gpedit.ms c ရုိက္ပါ.....Enter ေခါက္ပါ။
**ဘယ္ဘက္ျခမ္းက Computer Configuration ကို Expand လုပ္ပါ။
**Administrative Templates ကို Expand လုပ္ပါ။
**Network ကို Expand လုပ္ပါ။
**Qos Packet Scheduler ကိုေရြးပါ။
**ၿပီးလွ်င္ ညာဘက္ျခမ္းက Limit Reservable Bandwidth ဆိုတဲ့စာေၾကာင္းေပၚမွာ double Click ႏွိပ္ပါ။
**Limit Reservable Bandwidth Properties box မွာ Enable option ကိုေရြးပါ။
**Bandwidth Limit [%] box မွာ 0% ကို 20 % ေျပာင္းၿပီး ok ႏွိပ္ပါ။
ပိုျမန္လာပါလိမ့္မယ္..။


Labels: ,

Print ပဲထုပ်ပါ..pdf ထုပ်လျှင်.ဖောင့်လွဲနေလိမ့်မယ်


မာတိကာ ၁ မာတိကာ ၂ မာတိကာ ၃ မာတိကာ ၄ မာတိကာ ၅
0 comments

470..Webpage ေတြမွာ လိုအပ္တဲ႔ အပိုင္းေလးေတြကို ျဖတ္ေတာက္Print Screen ထုတ္ ျခင္း္

 
Webpage ေတြမွာ လိုအပ္တဲ႔ အပိုင္းေလးေတြကို ျဖတ္ေတာက္
လို့ရပါတယ္.......
http://bigwebhead.com/wp-content/uploads/2008/05/screengrab-firefox-add-ons_1211306552328-150x150.png

https://addons.mozilla.org/en-US/firefox/addon/1146

ကိုသြားလိုက္ပါ.....
ျပီးရင္...
Add to Firefox ဆိုတာေလးကို Click လိုက္ပါ....
Install Now ဆိုတာ ေပၚလာလိမ္႔မယ္ .. အဲဒါကို Click လိုက္ Install လုပ္သြား ျပီးရင္ Firefox ကို Restart ေပးလိုက္ပါ .. ျပီးရင္ Firefox ကို ျပန္ဖြင္႔ၾကည္႔ ပါကhttp://i39.tinypic.com/vyqmwo.png ေလးကိုေအာက္မွာေတြ့ရမယ္....
*
*
အသံုးျပဳလိုပါက..
ေအာက္နားမွာ ေပၚေနတဲ႔ Screengrab ေလးကို Click တစ္ခ်က္ႏွိပ္လိုက္ပါ..
ေပၚလာတဲ့ထဲက Save ကိုသံုးပါမယ္.....
****Complete Page / Frame ...... Webpage တစ္ခုလံုးကို Print Screen
**** Visible Position ..................Browser မွာ ျမင္ေနရတဲ႔ Webpage
အပိုင္းေလးကို Print Screen
**** Selection........................... မိမိDrag ဆြဲျပီး Print Screen
စသည္ျဖင့္ အသံုးျပဳႏိုင္ပါတယ္ ။

Save မည္႔ေနရာကို ေရြးျပီး Save လိုက္ရင္ ရပါျပီ ..။

Labels: , , , ,

Print ပဲထုပ်ပါ..pdf ထုပ်လျှင်.ဖောင့်လွဲနေလိမ့်မယ်


မာတိကာ ၁ မာတိကာ ၂ မာတိကာ ၃ မာတိကာ ၄ မာတိကာ ၅
0 comments

462..How to add Myanmar Calendar in a blog?

 
လုပ္နည္းမွာ
1) blogger.com တြင္ Login ၀င္ပါ။
2) "Manage Your Blog" တြင္ Layout ကိုႏွိပ္ပါ။
3) Side bar ဘက္တြင္ "Add Page Element" ကို ႏွိပ္ပါ။\
4) Feed တြင္ "Add To Blog" ကို ႏိွပ္ပါ ("Feed"-Add content from an RSS or Atom feed to your blog.)
5) "Feed URL" တြင္ http://samerss.myanmarcalendar.com ကို ထည့္သြင္းပါ။ "Continue" ကိုႏွိပ္ပါ။
6) Title ကို သင္ႏွစ္သက္သလိုျပင္လို႔ရပါသည္။
ပီးေတာ့ "SAVE CHANGES" ကို ႏွိပ္လိုက္ရင္ သင့္ Blog မွာ ျမန္မာေန႔စြဲ ေပၚလာပါမည္
ျမန္မာျပကၡဒိန္ ကို ေရးတဲ့ ကို၀ဏၰကို ေရးထားတာ။


Labels: ,

Print ပဲထုပ်ပါ..pdf ထုပ်လျှင်.ဖောင့်လွဲနေလိမ့်မယ်


မာတိကာ ၁ မာတိကာ ၂ မာတိကာ ၃ မာတိကာ ၄ မာတိကာ ၅
0 comments

460..ကြန္ပ်ဴတာ တစ္ခုအတြင္းမွာ ရိွေသာ Services မ်ားကို ေဖာ္ထုတ္ေသာ နည္း

 
// IMPORTANT: Add 'System.Management' to
// your References in your Project

using System;
using System.IO;
using System.Management;
namespace ListServices
{
///
/// Summary description for Class1.
///

class Class1
{
///
/// The main entry point for the application.
///

[STAThread]
static void Main(string[] args)
{
ManagementObjectSearcher query;
ManagementObjectCollection queryCollection = null;
System.Management.ObjectQuery oq;
string strComputerName;
string strQuery = "SELECT * FROM Win32_Service";
Console.WriteLine( "Check out http://www.mr-programmer.com for more samples, components and software\r\n" );
// Ask for a computer name
do
{
Console.Write( "Please enter server name (type 'localhost' for local machine): " );
strComputerName = Console.ReadLine();
} while( strComputerName == "" );
// Connect to the remote computer
ConnectionOptions co = new ConnectionOptions();
if (strComputerName.Trim().Length == 0)
{
Console.WriteLine("Must enter machine IP address or name.");
return;
}
//Point to machine
System.Management.ManagementScope ms = new System.Management.ManagementScope("\\\\" + strComputerName + "\\root\\cimv2", co);
//Query remote computer across the connection
oq = new System.Management.ObjectQuery(strQuery);
query = new ManagementObjectSearcher(ms,oq);
try
{
queryCollection = query.Get();
}
catch (Exception e1)
{
Console.WriteLine( "Error: " + e1 );
}
foreach ( ManagementObject mo in queryCollection )
{
//create child node for operating system
Console.WriteLine( mo["Name"].ToString() + " [" + mo["StartMode"].ToString() + "]" );
}
}
}
}

Ref: Mr Programmer


Labels: , ,

Print ပဲထုပ်ပါ..pdf ထုပ်လျှင်.ဖောင့်လွဲနေလိမ့်မယ်


မာတိကာ ၁ မာတိကာ ၂ မာတိကာ ၃ မာတိကာ ၄ မာတိကာ ၅
0 comments

457..bx-errorcode.blog( For Template Chang )

 
တမ္းပလိပ္ အသစ္ေျပာင္းလို့ bx -........ error ျပေနရင္
အဒီ error နဲ႔ ပတ္သတ္ၿပီး ေရးထားတဲ့ ဘေလာ့တခုကေတာ့

"http://bx-errorcode.blogspot.com

၀င္ျပီးေလ့လာလို့ရတယ္......

Labels: , , , , , ,

Print ပဲထုပ်ပါ..pdf ထုပ်လျှင်.ဖောင့်လွဲနေလိမ့်မယ်


မာတိကာ ၁ မာတိကာ ၂ မာတိကာ ၃ မာတိကာ ၄ မာတိကာ ၅
0 comments

455..ႏုတ္ခမ္းနီေတြနဲ႔ ပတ္သက္ၿပီး ဗဟုသုတ

 
Image Hosted by ImageShack.us

စစခ်င္းသတိရမိေစတာကေတာ့ အီဂ်စ္လူမ်ိဳးေတြကိုပဲ ျဖစ္ပါတယ္။ အီဂ်စ္လူမ်ိဳးေတြဟာ မိပ္ကပ္ cosmetic ေတြကို စတင္တီထြင္ခဲ့တဲ့ သူေတြမဟုတ္လား။ ႏုတ္ခမ္းနီဆိုးဖို႔ကိုလည္း သူတို႔ေတြကပဲ စတင္ခဲ့တာပါ။ အီဂ်စ္လူမ်ိဳးေတြေနာက္မွာေတာ့ ဂရိလူမ်ိဳးေတြနဲ႔ ေဘဘီလံုေတြက မိတ္ကပ္လိမ္းျခယ္ျခင္းရဲ႕ ကနဦးလူသားေတြအျဖစ္ ရပ္တည္လို႔ေနၾကပါတယ္။ ေနာက္ပိုင္းေတြမွာမွ အေနာက္ႏိုင္ငံေတြကို ပ်ံ႕ႏွံ႕ေရာက္ရွိလာခဲ့တာပါ။ အဲလိဇဘက္ ဘရင္မဟာ သူမရဲ႕ႏုတ္ခမ္းေတြလွပဖို႔အတြက္ မာက်ဴရီဆာလဖိုဒ္ကို လိမ္းျခယ္ခဲ့တယ္လို႔ သိရပါတယ္။ သူမသာမက သူမရဲ႕အထိန္းေတာ္ အပ်ိဳေတာ္ေတြကိုလည္း ဒါကိုလိမ္းျခယ္ဖို႔ တိုက္တြန္းအားေပးေလ့ ရွိပါသတဲ့။
ႏုတ္ခမ္းနီေတြအေၾကာင္းကို ေျပာရမယ္ဆိုရင္ေတာ့ ျဖဴ၊ မဲ ရုပ္ရွင္ေတြေခတ္က မင္းသမီးေတြကို သတိရမိပါေသးတယ္။ သူတို႔ေတြရဲ႕ ႏုတ္ခမ္းဟာ မ်ားေသာအားျဖင့္ မဲေနတတ္ၾကတယ္ မဟုတ္လား။ တစ္ကယ္ေတာ့ဒါဟာ ႏုတ္ခမ္းေတြ မဲေနတာေတာ့ မဟုတ္ဘူးရွင့္။ အနီပုပ္ေရာင္ ႏုတ္ခမ္းနီေတြကို ဆိုးထားျခင္းသာ ျဖစ္ပါတယ္။ ၿပီးေတာ့ ႏုတ္ခမ္းနီ ဆိုးလိုက္ရင္ မိန္းကေလးေတြဟာ အနည္းနဲ႔ အမ်ားေတာ့ sexy အသြင္ေလး ေဆာင္သြားတတ္ၾကတယ္... အခု အသံုးျပဳေနၾကတဲ့ push-up ႏုတ္ခမ္းနီကိုေတာ့ 1915 ခုႏွစ္မွာ စတင္ထုတ္လုပ္ခဲ့ပါတယ္။ ႏုတ္ခမ္းနီမွာ အဓိကပါ၀င္တာေတြကေတာ့ ေရာင္ျခယ္ပစၥည္းေတြနဲ႔ အဆီေတြပဲျဖစ္ပါတယ္။ ႏုတ္ခမ္းနီေတြနဲ႔ ပတ္သက္ၿပီး တိုးတက္လာမႈ အေျခအေနေတြကေတာ့….

1952: စစ္ႀကီးၿပီးတဲ့ အခ်ိန္ေပါ့။ Revlon ကုမၸဏီက ကမၻာ့အႀကီးက်ယ္ဆံုးေသာ ႏုတ္ခမ္းနီေၾကာ္ျငာေတြကို လုပ္ခဲ့ပါတယ္။ အဲဒီတုန္းက သူေၾကာ္ျငာခဲ့တာက “Fire & Ice” ဆိုတဲ့ အမ်ိဳးအစားေပါ့။ ေနာက္ပိုင္းမွာေတာ့ မဂၢဇင္းစာမ်က္ႏွာ ေတာ္ေတာ္မ်ားမ်ားမွာ ႏုတ္ခမ္းနီေၾကာ္ျငာေတြကို ေတြ႔လာရေတာ့တာပါပဲ။

1957: Gala ကေနထုတ္လိုက္တဲ့ ႏုတ္ခမ္းနီဟာ ကမၻာေပၚမွာ ပထမဆံုးေသာ tube ပံုစံႏုတ္ခမ္းနီ ျဖစ္လာပါတယ္။ အမ်ိဳးသမီးေတြက ႏုတ္ခမ္းနီဆိုးဖို႔ Brush ကိုသံုးေနမက်ေသးတဲ့ အခ်ိန္ျဖစ္လို႔ အဲဒီတုန္းက ႏုတ္ခမ္းနီဆိုးဖို႔ကို မိနစ္ 20ေလာက္ အခ်ိန္ယူခဲ့ရတယ္လို႔လည္း မွတ္သားရပါတယ္။

1958: Max Factor ကေျပာတယ္.. ႏုတ္ခမ္းနီ မဆိုးထားတဲ့ မိန္းမတစ္ေယာက္ဟာ လူေရ့ွသူေရ့ွမွာ အ၀တ္၀တ္မထားတာနဲ႔ တူတူပါပဲ… တဲ့။ ခုေတာ့ မိန္းကေလးေတာ္ေတာ္မ်ားမ်ားလည္း ႏုတ္ခမ္းနီေတြ ဆိုးကုန္ၾကေလၿပီ။

1959: မာရီလင္ မြန္ရိုးပါတဲ့ ရုပ္ရွင္ေတြမွာ မိန္းမေတြဟာ အေရာင္အေသြးေတာက္ပတဲ့ ႏုတ္ခမ္းနီေတြဆိုးၿပီး ပုရိသေတြကို ေသြးဆူေအာင္ ဖမ္းစားေနေလရဲ႕။

1973: Bonne Bell က အေရာင္ အနဲ႔ ထူးျခားတဲ့ lip gloss ေတြကို စတင္ေရာင္းခ်ပါတယ္။ ခုလက္ရွိ Bonne Bell ကထုတ္တဲ့ ပစၥည္္းေတြကုိၾကည့္ရင္ေတာ့ အဲဒီတုန္းက သူတို႔ထုတ္တာ ဘယ္ေလာက္မ်ား ထူးျခားလို႔လဲလို႔ ေမးလာႏိုင္စရာရွိပါတယ္။ အဲဒီတုန္းကေတာ့ lip gloss ေတြက ေတာ္ေတာ္ေလးကုိ နည္းေသးတယ္ေလ။ အဲလိ္ုနည္းေသးတဲ့ အခ်ိန္မွာ Bonne Bell က အရမ္းကိုရွားပါးတဲ့ စေတာ္ဘယ္ရိနံ႕၊ ဂ်ယ္လီနံ႕ေတြလိုမ်ိဳး Lip Gloss မ်ိဳးေတြကို ထုတ္လုပ္ႏိုင္ခဲ့တာပါ။ ခုေတာ့ လူေတြက Bonne Bell ကထုတ္တဲ့ ႏုတ္ခမ္းနီေတြကို သိပ္စိတ္မ၀င္စားၾကေတာ့ပါဘူး။ တစ္ျခား Brand ေတြကိုပဲ အာရံုက်ေနတာ မ်ားပါတယ္။

1986: မက္ေဒါနားက သူမရဲ႕အႀကိဳက္ဆံုး ႏုတ္ခမ္းနီဟာ M-A-C's Russian Red ျဖစ္တယ္လို႔ ေၾကျငာလိုက္ေတာ့ မိန္းမ ေတာ္ေတာ္မ်ားမ်ား အဲဒါကို လိုက္၀ယ္ၾကေတာ့တာပါပဲ။ အဲဒီအခ်ိန္က စၿပီး နာမည္ႀကီးေတြ တစ္ခုခုေၾကျငာလိုက္တာနဲ႔ လူေတြေနာက္ကေန လိုက္၀ယ္တတ္ၾကတယ္ဆိုတာ သတိျပဳမိလာၾကပါတယ္။ ခုခ်ိန္ထိပဲစိုပါစို႔။

1996: ႏုတ္ခမ္းနီအေရာင္ ေဖ်ာ့ေဖ်ာ့ေလးေတြ ပိုနာမည္ႀကီးလာတယ္။ သဘာ၀ႏုတ္ခမ္းသား အတိုင္းလိုမ်ိဳး ႏုတ္ခမ္းနီေရာင္ ေလးေတြေပါ့။ တစ္ခ်ိဳ႕ေတြကေတာ့ ႏုတ္ခမ္းနီဆိုးတယ္.. ၿပီးေတာ့ တစ္ရွဴးတို႔ ေပပါတို႔နဲ႔ ျပန္ဖ်က္ၿပီး ႏုတ္ခမ္းနီအေရာင္ ေဖ်ာ့ေဖ်ာ့ေလးျဖစ္ေအာင္ ထားတတ္ၾကေသးတယ္။

2000: Trend ကေတာ့ ေတာ္ေတာ္ႀကီးကို ေျပာင္းလဲလာပါၿပီ။ အသစ္ အသစ္ေတြကလည္း ေပါမွ ေပါ ပါပဲ

Image Hosted by ImageShack.us

ႏုတ္ခမ္းနီေတြရဲ႕ သမိုင္းေၾကာင္းနဲ႔ ျဖစ္တည္မႈေလးကေတာ့ ဒီေလာက္ပါပဲ။ ဆက္လက္ၿပီး ႏုတ္ခမ္းနီ ၀ယ္ေတာ့မယ္ဆိုရင္ အေရာင္ကို ဘယ္လိုေရြးခ်ယ္မလဲ၊ ဘယ္လိုအမ်ိဳးအစားကို ၀ယ္သင့္သလဲဆိုတာကိုလည္း တစ္ခ်က္ေလာက္ ၾကည့္ၾကရေအာင္။

1. ကိုယ့္ႏုတ္ခမ္းသား အေရာင္နဲ႔ အနီးစပ္ဆံုး တူတဲ့ႏုတ္ခမ္းနီကို ေရြးခ်ယ္ရပါမယ္။ အသားမဲတဲ့ သူေတြကေတာ့ အနီရင့္ေရာင္၊ ၀ိုင္အရက္ေရာင္ေတြနဲ႔ လိုက္ဖက္ၿပီး အသားျဖဴတဲ့သူမ်ိဳးေတြကေတာ့ ပန္ေရာင္၊ အညိဳေရာင္ လိေမၼာ္ေရာင္လိုမ်ိဳးေတြနဲ႔ သင့္ေတာ္ပါတယ္။
2. ေန႔ဘက္ေတြမွာ ေပါ့ပါးေပၚလြင္တဲ့ အေရာင္မ်ိဳးကိုဆိုးၿပီး ညဘက္ေတြမွာေတာ့ အေရာင္ရင့္ရင့္ ႏုတ္ခမ္းနီမ်ိဳးကို ဆိုးသင့္ပါတယ္။ ၿပီးေတာ့ ေန႔ဘက္ေတြမွာ ရိုးရိုး cream ႏုတ္ခမ္းနီမ်ိဳးက သင့္ေတာ္ၿပီး ညေနခင္းေတြမွာဆိုရင္ေတာ့ gloss လိုမ်ိဳး အေရာင္လက္လက္ေလးေတြကို သံုးဖို႔ ပိုသင့္ေတာ္ပါတယ္။
3. ျဖစ္ႏိုင္မယ္ဆိုရင္ေတာ့ မိတ္ကပ္ပညာရွင္ေတြဆီသြားၿပီး ကိုယ့္ႏုတ္ခမ္းဟာ ဘယ္လိုအေရာင္မ်ိဳးနဲ႔ သင့္ေတာ္တယ္ဆိုတာကို စမ္းသပ္ၾကည့္သင့္ပါတယ္။ ၿပီးေတာ့ သဘာ၀ အလင္းေရာင္ထဲမွာပဲ ကိုယ္ဆိုးထားတဲ့ အေရာင္ဟာ ကိုယ္နဲ႔လိုကမလိုက္ ၾကည့္ေစခ်င္ပါတယ္။
4. အေရာင္ေတြကို ကိုယ့္ဖာသာကိုယ္လည္း စပ္ၾကည့္ႏိုင္ပါတယ္။ ကိုယ္ႏွစ္သက္တဲ့ အေရာင္ေတြကို ရွာ၀ယ္လို႔ မရႏိုင္ရင္ေတာ့ ကိုယ့္ဘာသာကိုယ္ စပ္လိုက္တာ အေကာင္းဆံုးပါပဲ။
5. ေနာက္တစ္ခုကေတာ့ ကိုယ့္ႏုတ္ခမ္းနီ အေရာင္ထက္ရင့္တဲ့ သို႔မဟုတ္ အေရာင္တူတဲ့ lip liner မ်ိဳးကို သံုးရပါမယ္။
6. ႏုတ္ခမ္းနီ ဆိုးၿပီးသြားရင္ေတာ့ Lip Liner ေလးဆြဲၿပီး အဆံုးသတ္ဖို႔ တိုက္တြန္းပါရေစ....

ေနာက္တစ္ခါ ႏုတ္ခမ္းနီနဲ႔ ပတ္သက္ၿပီး ေဆာင္ရန္ ေရွာင္ရန္ မွတ္သားရန္ အခ်က္ကေလးေတြကေတာ့..

1. Lip Liner ေတြဟာ ႏုတ္ခမ္းနီ အေရာင္နဲ႔ လိုက္ဖက္မႈ ရွိရပါမယ္။ ပန္းေရာင္ ႏုတ္ခမ္းနီဆိုးၿပီး အနက္ေရာင္ လိုင္နာႀကီး ဆြဲတာမ်ိဳးေတာ့ မလုပ္ရဘူးေလေနာ္။
2. Brush တစ္ေခ်ာင္း အၿမဲေဆာင္ထားပါ။ ႏုတ္ခမ္းနီဆိုးတဲ့ brush ေတြက ႏုတ္ခမ္းနီဆိုးတဲ့အခါ ေသေသသပ္သပ္ ၿပီးေျမာက္ေအာင္ ျဖည့္ဆည္းေပးႏိုင္သလို ႏုတ္ခမ္းနီေတြ ေဘးကို မျပန္႔ေအာင္လည္း ထိန္းထားေပးႏိုင္ပါတယ္။
3. အသက္ 40 ေက်ာ္ေနၿပီဆိုရင္ေတာ့ Lip Gloss ေတြ မဆိုးတာ အေကာင္းဆံုးပါပဲ။ ခရမ္လိုမ်ိဳး ႏုတ္ခမ္းနီေတြကသာ ေလးဆယ္ေက်ာ္ မမလွလွေတြနဲ႔ သင့္ေတာ္ပါတယ္။
4. လိေမၼာ္ေရာင္ ႏုတ္ခမ္းနီေတြကေတာ့ သင့္ရဲ႕သြားေတြကို ေပက်ံေစတတ္ပါတယ္။ သြားေတြလည္း အေရာင္ေျပာင္းၿပီး ၀ါသြားတတ္တယ္ေပါ့ေလ။
5. ႏုတ္ခမ္းနီ အေရာင္ကို မႀကိဳက္ရင္ေတာ့ ပါးနီိလိုလည္း စမ္းၾကည့္ႏိုင္ပါေသးတယ္။ တစ္ခ်ိဳ႕ႏုတ္ခမ္းနီေတြဟာ ႏုတ္ခမ္းေပၚမွာ အေရာင္မလွေပမယ့္ ပါးေပၚမွာေတာ့ ေတာ္ေတာ္ေလးကို လွေနတတ္ပါတယ္။
6. ပါးနီအျဖစ္ပါ သံုးလို႔ မႀကိဳက္ေသးဘူး ဆိုရင္ေတာ့ တစ္ျခားႏုတ္ခမ္းနီ အေရာင္ေတြနဲ႔ ေရာစပ္ၿပီး ဆိုးၾကည့္ႏိုင္ပါေသးတယ္။
7. ႏုတ္ခမ္းနီေတြဟာ ေရခဲေသတၱာထဲမွာ သိမ္းထားရင္ အေရာင္ၾကာရွည္ခံတယ္လုိ႔လည္း သိရပါတယ္။


Labels: , , , ,

Print ပဲထုပ်ပါ..pdf ထုပ်လျှင်.ဖောင့်လွဲနေလိမ့်မယ်


မာတိကာ ၁ မာတိကာ ၂ မာတိကာ ၃ မာတိကာ ၄ မာတိကာ ၅
0 comments

429.. Windows Vista တင္ျပီးမွ XP ကို Dual Boot တင္ျခင္း

 
Windows Vista တင္ျပီးမွ ဟိုဟာတင္မရ ဒီဟာတင္မရနဲ႔ ဒုတၡေရာက္ေနသူေတြအတြက္ပါ။


၁။ Vista တင္ကတည္းက Hard Disk ကို Partition ၂ ျခမ္းခြဲထားတယ္။ မခြဲရေသးရင္ Vista ရဲ႕ Disk Manager မွာ Shrink လုပ္လို႔ရတယ္။
၂။ Windows XP CD နဲ႔ boot လုပ္ျပီး XP ကို New Partition မွာ တင္ရပါမယ္။
၃။ Windows XP installation ျပီးသြားရင္ Vista ကိုျပန္ျပီး Active ျဖစ္ေအာင္လုပ္ရပါမယ္။
၄။ XP တင္လိုက္ျခင္းေၾကာင့္ Vista ရဲ႕ Boot Loader Record ေတြပ်က္ကုန္တာကို အရင္ Repair လုပ္ေပးရပါမယ္။ Vista DVD ကို ထည့္ျပီး Windows ကို Restart လုပ္ပါ။ ျပီးရင္ Boot from CD ဆိုျပီး Vista CD နဲ႕ Setup ကို Run ရပါမယ္။
၅။ Setup run လာရင္ "Install Now" ကို Click ပါ။
၆။ ျပီးရင္ "Repair your computer" ကို Click ပါ။
ရ။ System Recovery Options screen ေပၚလာပါလိမ့္မယ္။ Startup Repair ကို Click ပါ။
၈။ ဒါဆိုရင္ သင့္ Computer ဟာ Vista နဲ႔ Boot ျပန္တက္လာပါလိမ့္မယ္။
၉။ Dual Boot ကို Computer Setup မွာ Boot Menu အလြယ္တကူ ေပၚလာေစဖို႔ ဒီ

EasyBCD Software

ေလးကို Windows Vista မွာ Install လုပ္ရပါမယ္။
၁၀။ EasyBCD ကို Install လုပ္ျပီး Run ပါ။
၁၁။ Add/remove Entries ကို Click ပါ။ ျပီးရင္ XP Install လုပ္ထားတဲ့ Drive နဲ႔ Version ကို "Windows NT/2k/XP/2k3" ဆိုျပီးေရြးပါ။ Add Entry ကို Click ပါ။ Save ကို Click ပါ။
၁၂။ ခုဆိုရင္ သင့္ Computer ဟာ XP နဲ႔ Vista ကို Dual boot Run ႏိုင္ပါျပီ။
Ref:manawphyu


Labels: , , ,

Print ပဲထုပ်ပါ..pdf ထုပ်လျှင်.ဖောင့်လွဲနေလိမ့်မယ်


မာတိကာ ၁ မာတိကာ ၂ မာတိကာ ၃ မာတိကာ ၄ မာတိကာ ၅
0 comments

420..How To Make Email Subscription Usine Feed Burner

 
Print ပဲထုပ်ပါ..pdf ထုပ်လျှင်.ဖောင့်လွဲနေလိမ့်မယ်


မာတိကာ ၁ မာတိကာ ၂ မာတိကာ ၃ မာတိကာ ၄ မာတိကာ ၅
0 comments

416..အသံုးမ်ား/၀င္တဲ့ Run Command ေလးမ်ား


Start>Run ဒါမွမဟုတ္ Windows + R ကို ႏွိပ္ၿပီးရင္

Windows Temporary Files ေတြ ရွိတဲ့ ေနရာကိုဖြင့္ဖို႔
%temp% or %tmp%
Click OK

Program Files ကိုဖြင့္ဖို႔
%programfiles%

Windows Folder ကိုဖြင့္ဖို႔
%systemroot% or %Windir%

Windows Folder ထဲက System32 ကိုဖြင့္ခ်င္ရင္ ေနာက္က Folder Name ကို Back Slash (\) ခံၿပီး ဆက္႐ိုက္လို႔ရတယ္
%systemroot%\System32

အေပၚက Shortcut ေတြက Environment Variables မွာ ေရးထားတဲ့ Path ေတြပါ

Internet Options ကိုဖြင့္ဖို႔
inetcpl.cpl
Click OK

Desktop Properties ကိုဖြင့္ဖို႔
desk.cpl
Click OK

Computer Management ကိုဖြင့္ဖို႔
compmgmt.msc
Click OK

Accessibility controls Keyboard(1), Sound(2), Display(3), Mouse(4), General(5)
access.cpl

Add/Remove Programs
appwiz.cpl

Display properties Themes(5), Desktop(0), Screen Saver(1), Appearance (2), Settings(3)
desk.cpl

Add hardware
hdwwiz.cpl

Configure Internet Explorer and Internet properties General(0), Security(1), Privacy(2), Content(3), Connections(4), Programs(5), Advanced(6)
inetcpl.cpl

Regional settings Regional Options(1), Languages(2), Advanced(3)
intl.cpl

Game controllers
joy.cpl

Mouse properties and settings Buttons(0), Pointers(1), Pointer Options(2), Wheel(3), Hardware(4)
main.cpl

Keyboard properties Speed(0), Hardware (1)
main.cpl,@1


Sounds and Audio Volume(0), Sounds(1), Audio(2), Voice(3), Hardware(4)
mmsys.cpl

Network properties
ncpa.cpl

User accounts
nusrmgr.cpl

Power configuration Power Schemes, Advanced, Hibernate, UPS (Tabs not indexed)
powercfg.cpl

System properties General(0), Computer Name(1), Hardware(2), Advanced(3), System Restore(4), Automatic Updates(5), Remote (6)
sysdm.cpl

Phone and modem options Dialing Rules(0), Modems(1), Advanced(2)
telephon.cpl

Date and time properties Date & Time(0), Time Zone(1), Internet Time (no index)
timedate.cpl


Microsoft Management Console ထဲမွာ ပါတဲ့ applet ေတြကို ဖြင့္တဲ့ Run Command ေတြပါ..

Certificates
certmgr.msc

Indexing Service
ciadv.msc

Computer Management
compmgmt.msc

Device Manager
devmgmt.msc

Disk Defragmenter
dfrg.msc

Disk Management
diskmgmt.msc

Event Viewer
eventvwr.msc

Shared Folders
fsmgmt.msc

Group Policy
gpedit.msc

Local Users and Groups
lusrmgr.msc

Removable Storage
ntmsmgr.msc

Removable Storage Operator Requests
ntmsoprq.msc

Performance
perfmon.msc

Resultant Set of Policy
rsop.msc

Local Security Settings
secpol.msc

Services
services.msc

Windows Management Infrastructure (WMI)
wmimgmt.msc

Component Services
comexp.msc


ပိုမိုေလ့လာခ်င္ရင္


Labels: ,

Print ပဲထုပ်ပါ..pdf ထုပ်လျှင်.ဖောင့်လွဲနေလိမ့်မယ်


မာတိကာ ၁ မာတိကာ ၂ မာတိကာ ၃ မာတိကာ ၄ မာတိကာ ၅
0 comments

413..လက္ကိုင္ဖုန္းထဲက သီခ်င္းေတြ၊ ဓါတ္ပံုေတြကို ကြန္ပ်ဴတာထဲထည့္နည္း

 
ဖုန္း၀ယ္ရင္ ၊ ဖုနး္ႏွင့္ ကြန္ပ်ဴတာ ခ်ိတ္ဆက္ဖို႔ ေဆာ့ဖ္၀ယ္ CD တစ္ခ်ပ္ပါမယ္။
ခ်ိတ္ဆက္ဖို႔ USB ဆိုတဲ့ ၾကိဳးတစ္ေခ်ာင္းပါမယ္ ၊
CD ထဲတြင္ ပါလာေသာ ေဆာ့ဖ္၀ယ္မွ ဘယ္ဟာႏွိပ္၊ ဟိုဟာႏွိပ္ႏွင့္ သူ၏ ေမးေသာ ေမးခြန္းမ်ားကိုလည္း ေျဖၾကားေပးေနသည္။ သို႔ေနာက္ ျပီးသြားသည့္တိုင္ေအာင္၊ လက္ကိုင္ဖုန္းထဲမွ သီခ်င္းႏွင့္ ဓါတ္ပံုမ်ား ကြန္ပ်ဴတာထဲ သို႔ မေရာက္ေသးေပ။ သို႔ေၾကာင့္ ေဒါသလည္း အလြန္ထြက္မိသည္၊ ကူညီေနေသာ အခါတြင္ လုပ္ရင္း မျပီးသည္ကို အခ်ိန္ျဖဳန္းမိေလသလားဟု စိတ္ထဲထင္မိသည္။ သို႔ေသာ္ ဇြဲမေလွ်ာ့ပါေလ၊ ဆက္လက္၍ ေဆာ့ဖ္၀ယ္တစ္ခုအား လင့္ခ္ေပးမိသည္။
ဒီေဆာ့ဖ္၀ယ္ကို စာရင္း၀င္လိုက္တာႏွင့္ သံုးလို႔ရမယ္ ”
“ ေအး ၊ စာရင္း သြင္းေနျပီ ”

သို႔ႏွင့္ ကၽြန္ေတာ္ သူျပီးသည္အထိ ေစာင့္ေနမိသည္။

“ ဟာ ပိုက္ဆံေပးရမည့္ ကဒ္နံပါတ္ ေတာင္းေနတယ္၊ ငါမေပးခ်င္ပါဘူး ”
“ ဟုတ္ဘူး၊ အဲဒါ ကဒ္နံပါတ္ ေတာင္းတာ၊ ရက္ ၃၀ အခမဲ့ စမ္းသံုးခြင့္ ေပးတယ္ေလ၊ ရက္၃၀ မတိုင္ခင္မွာ စာရင္းျပန္ထြက္လိုက္ေပါ့ ”
“ စာရင္းျပန္ထြက္လိုက္ရင္ သူပိုက္ဆံမျဖတ္ေတာ့ဘူး”

ဒီလို ပံုစံမ်ိဳး ကၽြန္ေတာ္ လုပ္ခဲ့တာ ၾကာေလျပီ။ လက္ထဲတြင္ ရွိေသာ မာစတာကဒ္ (ေငြးေၾကးကဒ္)တစ္ကဒ္ ႏွင့္ ေဆာ့ဖ္၀ယ္ကုမၸဏီမ်ား၏ ကြန္ရက္မ်ားကို ၀င္ျပီး၊ သူတို႔ အခမဲ့ စမ္းသံုးခြင့္ ေပးထားတဲ့ ေဆာ့ဖ္၀ယ္မ်ားကို သံုးၾကည့္သည္။ ဘယ္လိုအသံုး၀င္သလဲဟု၊ ေရွ႕ဆက္ေရာ သံုးမိမည့္ ေဆာ့ဖ္၀ယ္လား၊ ဆက္သံုးရင္ ပိုက္ဆံ ဘယ္ေလာက္ျဖတ္မလဲ၊ စသည္ျဖင့္ ေတြးေတာရသည္။ သံုးဖို႔ မတန္လ်င္ေတာ့ သူတို႔ ေျပာထားသည့္ ရက္ပိုင္းအတြင္းတြင္ စာရင္းျပန္ထြက္ေပးရသည္၊ သို႔မဟုတ္လ်င္ ကဒ္ထဲသို႔ ေဆာ့ဖ္၀ယ္ၾကိဳက္လို႔ ၀ယ္လိုက္သည္ထင္ကာ အလိုေလ်ာက္ ပိုိက္ဆံျဖတ္ေတာ့မည္။ ထို႔ေၾကာင့္ ကဒ္၏ နံပါတ္ႏွင့္ လ်ိဳ႕၀ွက္စာလံုးမ်ားေတာ့ ရင္းႏွီးမႈ ျပဳရသည္။ ရင္းႏွီးမႈးအတြက္ တန္ဖိုးရွိတာေတြေတာ့ ရလိုက္သည္၊ ထိုကား သူတို႔၏ အသစ္အစမ္း ေဆာ့ဖ္၀ယ္မ်ားကို သံုးဖူးလိုက္ျခင္းပင္။

“ ဟာ ဒါက ၊ ဘာေဆာ့ဖ္၀ယ္လဲ ”
“ ေၾသာ္၊ အကို႔ ကြန္ပ်ဴတာကို ကၽြန္ေတာ္ ဒီဘက္ကမၻာကေန လွမ္းသံုးလို႔ ရတယ္ေလ၊ ကၽြန္ေတာ္ဘာေတြ လုပ္ေနတယ္ဆိုတာလဲ အကိုျမင္ေနရတယ္ ”
“ ဟာ ေတာ္ျပီ။ သြင္းေတာ့ဘူး ကြန္ပ်ဴတာထဲမွာ Private Folder ေတြ ရွိတယ္ဟ ”
“ ေၾသာ္ ဟုတ္ဘူးေလ၊ အကို႔ Private Folder ၀င္ၾကည့္မလား၊ ကၽြန္ေတာ္လုပ္သင့္သာပဲ လုပ္သြားမယ္ေလ၊ အကိုလည္း ကၽြန္ေတာ္ ဘယ္ ဖိုင္ေတြ ဖြင့္ေနတယ္ဆိုတာ ျမင္ေနရတာပဲ ”
“ ဘာညာကြိကြ တူ႔းးးးးး.. ဘာညာကိကြ တ႔ူးးးး ”
“ ဘာညာကြိကြ တူ႔းးးး.... တူးးးး ဘာညာကြိကြ တ႔ူးးးးး”

ဟဲဟဲ၊ အဲေလာက္လည္း ပြဲၾကမ္းသြားတယ္ မထင္နဲ႔ဦး၊ ကာယကံရွင္က သေဘာမတူေတာ့လည္း ဆက္မလုပ္ေပးေတာ့ဘူးေပါ့ဗ်ာ။ ဒါေပမဲ့ ကိုယ္ကူညီလိုက္တဲ့ အရာဟာ မျပီးေတာ့လည္း ေနရထိုင္ရတာ သိပ္ခက္ခဲပါတယ္။ ကိုယ္ေျပာေနသမွ်ေတြလည္း သဲထဲေရသြန္လိုက္သလိုပါပဲ။

သို႔ႏွင့္ သူမ်ားေတြပဲ လိုက္လုပ္ေပးေနလို႔ ၊ ကၽြန္ေတာ့ကိုလည္း လုပ္ေပးၾကပါဦးဗ်ာ။ ဆရာမ ေမျငိမ္းက ဒီလိုဆိုပါတယ္။
ဆရာမ စာေတြကို ဘေလာ့မွာတင္ေနရင္ -ွ တို႔ -် တို႕ေတြဟာ ?? ေတြ ျဖစ္ကုန္ပါသတဲ့။
ဟုတ္ဘူးဆရာမ၊ ကၽြန္ေတာ္တို႔ေရာ ဒီလိုပဲ ျဖစ္တတ္တယ္။ ?? ေတြ အဲလိုပဲ ေပၚတယ္။ ဒါေပမဲ့ ကၽြန္ေတာ္ျဖစ္ေနတာေရာ သိခ်င္ၾကပါသလား။ ကၽြန္ေတာ္စာတင္လိုက္ရင္ ?? ေတာ့ ေပၚတာပါပဲ ၊ သို႔ေပမဲ့ ဒါေလးေတြၾကေတာ့ ဘယ္လိုလုပ္ၾကမလဲ။


?? ေတြ ပါတာက ခန္႔မွန္းလို႔ ရပါေသးတယ္။ ကၽြန္ေတာ့ဆီမွာေတာ့ ပို႔စ္တင္ျပီး စာလံုးေပါင္းေတြ ျပင္တဲ့ အခါမွာ ထို အကြက္မ်ား ေပၚလာပါေတာ့တယ္။ အကြက္ေတြဆိုေတာ့ ဘယ္လိုမွ ခန္႔မွန္းလို႔ မရပါ။ စာလံုးဘာေတြလည္း သိခ်င္ရင္ ကြန္ပ်ဴတာကို ပိတ္ျပီး ျပန္ဖြင့္ရင္ဖြင့္၊ မဖြင့္ရင္ ဘာစာလဲ သိေအာင္ Notepad ထဲ ျပန္ကူးထည့္ရပါတယ္။ ကဲ စာဖတ္သူတို႔ေရာ ဘယ္လိုျမင္ပါသလဲ။


Labels: , , , , , ,

Print ပဲထုပ်ပါ..pdf ထုပ်လျှင်.ဖောင့်လွဲနေလိမ့်မယ်


မာတိကာ ၁ မာတိကာ ၂ မာတိကာ ၃ မာတိကာ ၄ မာတိကာ ၅
0 comments

412..ဘေလာ့ပို႔စ္မ်ား အီးေမးသုိ႔ အေရာက္ပို႔ခ်င္ရင္


ခုတစ္ေလာ ကၽြန္ေတာ္ ဘေလာ့ေတြကို လိုက္မဖတ္ႏိုင္ေတာ့ဘူး။ အီးေမးကိုေတာ့ ေန႔တိုင္းစစ္ျဖစ္တာမို႔ အီးေမးထဲ ေရာက္လာတဲ့ Feed Burner က ပို႔ေပးလိုက္တဲ့ ဘေလာ့ပို႔စ္ေတြသာ ဖတ္ျဖစ္မိတယ္။ စိတ္မ၀င္စားဘူးဆိုရင္ေတာ့ ဖ်က္ျပစ္တယ္ေပါ့ဗ်ာ.. ဖတ္လို႔မအားေသးဘူးဆိုရင္လည္း မဖြင့္ပဲ သိမ္းထားတတ္ပါတယ္။

ဒီေတာ့ ဘေလာ့ဂါမ်ား ကၽြန္ေတာ္ အီးေမးထဲတြင္ ဖတ္ရႈႏိုင္ရန္ ဘယ္ပံုဘယ္နည္း ဘေလာ့ဖိဒင္း လုပ္ရတယ္ဆိုတာကို ေဖာ္ျပေပးလိုက္ပါတယ္။

ပထမ ဒီမွာ အေကာင့္အမည္ႏွင့္ လွ်ိဳ႕၀ွက္နံပါတ္ႏွင့္ အေကာင့္ထဲသို႔ ၀င္မယ္။ မရွိေသးေသာ သူမ်ား Creating One ဆိုတာကို ႏွိပ္ျပီး အေကာင့္ နာမည္အသစ္ယူႏိုင္ပါတယ္


အေကာင့္၀င္လိုက္တယ္ဆိုရင္ပဲ ဒီစာမ်က္ႏွာကို ေရာက္ရွိမွာျဖစ္ပါတယ္။ Burn A Feed Right this Instant ဆိုတဲ့ ေနရာမွာ ဘေလာ့လိပ္စာထည့္ေပးဖို႔လိုပါတယ္။ ဒီထဲမွာ လိပ္စာထည့္ေပးဖို႔ ကၽြန္ေတာ္တို႔ ဘေလာ့ဂါထဲကို သြားၾကည့္ၾကရမွာျဖစ္ပါတယ္။


ကိုထည့္မည့္ ဘေလာ့အေကာင့္ထဲ၀င္ျပီးသကာလ၊ ပံုမွာျမင္တဲ့အတိုင္း Layout ႏွိပ္ျပီးရင္ Edit Html ကို ႏွိပ္ၾကရမွာျဖစ္ပါတယ္။ Edit Html ကုိ ႏွိပ္လာတာႏွင့္ ဘေလာ့ကုဒ္မ်ား ေပၚလာမွာျဖစ္ပါတယ္။


ဘေလာ့ အကြက္ထဲမွာ ဒီလို စာသားေတြ ေပၚေနမွာပါ


အဲဒီထဲမွာ http://www.yourblogname.blogspot.com/feeds/posts/default ဆိုတာေလးကို ေကာ္ပီ ကူးယူရမွာပါ


ခုန ေကာ္ပီထားတဲ့ လိပ္စာေလးကို ဒီမွာ လာထည့္လိုက္ပါ


ထည့္လုိက္တဲ့ လိပ္စာ မွန္ကန္ေနရင္ ဒါမ်ိဳးစာသားေတြ ေပၚလာမွာျဖစ္ပါတယ္။ ကိုယ့္ရဲ႕လိပ္စာ အမည္ႏွင့္ ဘေလာ့ေခါင္းစဥ္ေပၚလာမွာျဖစ္ပါတယ္၊ Activate Feed ကို ဆက္ႏွိပ္ပါ


သင့္ ဘေလာ့ဟာ ဖိလို႔ရပါျပီ၊ ဘာညာ သာသကာ ေပၚလာမွာပါ၊ ဘာႏွင့္ ဖိလို႔ ဖိရမွန္းမသိသူမ်ား Next ကိုသာ ဆက္ႏွိပ္ပါ


Traffic ဘာဘာညာညာ ေလပန္းေနတာေလးေတြ ေတြ႕ရင္ Next ကို ဆက္ႏွိပ္ပါ


ဒီပံုမွာ Publize ဆိုတဲ့ ေနရာကို ႏွိပ္ပါ


Publize ကို ႏွိပ္တာႏွင့္ ဒီပံုစံ ေပၚလာမွျဖစ္ပါတယ္။ Feedburner (yep, we do now deliver into your mail box blabla ဆိုတာကို ေရြးလိုက္ပါ


ဒီပံုမွာ ကုဒ္ေတြ ေပၚလာတာကို ေတြ႕ရပါျပီ ဒီကုဒ္ေလးေတြကို ကၽြန္ေတာ္တို႔ ေကာ္ပီ လုပ္ၾကပါမယ္။ ကိုယ္ပိုင္ဘေလာ့ထဲမွာ သြားထည့္ဖို႔ ျဖစ္ပါတယ္။


ဘေလာ့ထဲက Layout ေအာက္က Page Element ကို ျပန္ႏွိပ္ျပီး ၊ ကိုယ္ထည့္ခ်င္တဲ့ ေနရာမွာ Add a Page Elemet ကို ႏွိပ္ၾကပါ


ႏွိပ္ျပီးရင္ ဒီအကြက္ေလး ေပၚလာမွာပါ၊ Html Java Script ဆိုတာကို ဆက္ႏွိပ္ပါ


ႏွိပ္လုိက္တာႏွင့္ စာသားမ်ားထည့္ရန္ အကြက္ေပၚလာမွာျဖစ္ပါတယ္။


ကၽြန္ေတာ္တို႔ Feed Burner က ေကာ္ပီ လုပ္လာတဲ့ ကုဒ္ေတြကို ဒီမွာထည့္ၾကမွာပါ၊ အဲဒီမွာ စာတမ္းေအာက္ပိုင္းကို လုက္ၾကည့္ျပီး (/form) ဆိုတဲ့ အေနာက္က စာသားေလးေတြ ျဖဳတ္လို႔ရပါတယ္။ ဒါဆို ဘေလာ့ဖိကေန ရယူထားတာပါဆိုတာ ေပၚေတာ့မွာ မဟုတ္ပါဘူး။ မဟုတ္ရင္ ကၽြန္ေတာ္တို႔ ဘေလာ့ေတြမွာ ေနရာယူပါတယ္။ ေနရာေပါေနသူမ်ား မျဖဳတ္ခ်င္လည္း ရပါတယ္။


ေဟာ ကၽြန္ေတာ့ဘေလာ့မွာ ခုလို သြားေပၚေနျပီျဖစ္ပါတယ္။ ညာဘက္ေဒါင့္ေလးမွာ အီေမးလိပ္စာမ်ား ထည့္ျပီး စာရင္းေပးသြင္းႏိုင္ၾကဖို႔ ျဖစ္ပါတယ္။


ကဲ ဒီေလာက္ဆို အဆင္ေျပၾကျပီ ထင္ပါတယ္။ လုပ္ျပီးသြားရင္လည္း လာေျပာလွည့္ဦး ကၽြန္ေတာ္ စာရင္းလာသြင္းမလို႔ပါ။
Ref: Htmikmin


Labels: ,

Print ပဲထုပ်ပါ..pdf ထုပ်လျှင်.ဖောင့်လွဲနေလိမ့်မယ်


မာတိကာ ၁ မာတိကာ ၂ မာတိကာ ၃ မာတိကာ ၄ မာတိကာ ၅
0 comments

411..Web Designer မ်ားအတြက္ CSS menus မ်ား

 
CSS Tab Designer is a unique and easy to use software to help you design css-based lists and tabs visually and without any programming knowledge required!
Separator


http://www.highdots.com/css-tab-designer/


  1. 11 CSS navigation menus
  2. 12 more CSS Navigation Menus
  3. 14 Free Vertical CSS Menus
  4. 2-level horizontal navigation
  5. Absolute Lists: Alternatives to Divs
  6. Accessible Image-Tab Rollovers
  7. ADxMenu
  8. A drop-down theme
  9. Bookend Lists: Using CSS to Float a Masthead
  10. Bulletproof Slants
  11. Centered Tabs with CSS
  12. Clickable Link Backgrounds
  13. Create a Teaser Thumbnail List Using CSS: Part 1
  14. Creating Indented Navigation Lists
  15. Creating Multicolumn Lists
  16. cssMenus - 4 Level Deep List Menu
  17. CSS and Round Corners: Build Accessible Menu Tabs
  18. CSS-Based Tabbed Menu
  19. CSS-based Navigation
  20. CSS: Double Lists
  21. CSS Mini Tabs (the UN-tab, tab)
  22. CSS only dropdown menu
  23. CSS only flyout menus
  24. CSS only flyout/dropdown menu
  25. CSS only flyout menu with transparency
  26. CSS only vertical sliding menu
  27. CSS Swag: Multi-Column Lists
  28. CSS Tabs
  29. CSS Tabs
  30. CSS tabs with Submenus
  31. dTree Navigation Menu
  32. Definition lists - misused or misunderstood?
  33. Do You Want To Do That With CSS? - Multiple Column Lists
  34. Drop-Down Menus, Horizontal Style
  35. Float Mini tabs
  36. Flowing a List Across Multiple Columns
  37. Free Menu Designs V 1.1
  38. FreeStyle Menus
  39. Hidden tab menu
  40. How to Style a Definition List with CSS
  41. How to Style an Unordered List with CSS
  42. How to Use CSS to Position Horizontal Unordered Lists
  43. Hybrid CSS Dropdowns
  44. Inline Mini Tabs
  45. Intelligent Menus
  46. Inverted Sliding Doors Tabs
  47. Light Weight Multi Level Menu
  48. List Display Problems In Explorer For Windows
  49. Listamatic
  50. Listamatic2
  51. Menus galleries in CSS and XHTML
  52. Mini-Tab Shapes
  53. Mini-Tab Shapes 2
  54. More than Just Bullets
  55. Multiple Column Lists
  56. A Navbar Using Lists
  57. Navigation Matrix Reloaded
  58. Remote Control CSS
  59. Remote Control CSS Revisited - Caving in to peer pressure
  60. Rounding Tab Corners
  61. Simple CSS Tabs
  62. Simplified CSS Tabs
  63. Sliding Doors
  64. Spruced-Up Site Maps
  65. Styling Nested List
  66. Suckerfish Dropdowns
  67. Tabtastic
  68. Tabs Tutorial
  69. Taming Lists
  70. Turning a List into a Navigation Bar
  71. Ultimate css only dropdown menu
Ref: CMS


Labels: , , , ,

Print ပဲထုပ်ပါ..pdf ထုပ်လျှင်.ဖောင့်လွဲနေလိမ့်မယ်


မာတိကာ ၁ မာတိကာ ၂ မာတိကာ ၃ မာတိကာ ၄ မာတိကာ ၅
0 comments

408..cryptography


နားလည္နုိင္ေအာင္ လွိ်ဳ ့၀ွက္ေသာ စာလံုးမ်ား သေကၤတမ်ားနဲ့ ေရးထားတဲ့ နည္းပညာကို (cryptography)ဟူေခၚပါတယ္ ။ အင္ဂ်င္နီယာပိုင္းအရ အဲဒီနည္းပညာကို ေအာက္ပါအတိုင္း အတိအက် အဓိပၸၸါယ္ ဖြင့္ဆိုပါတယ္ [1] - -

The study of ways to disguise messages so as to avert unauthorized interception is called cryptography.

အဲဒီနည္းပညာကို ဆက္သြယ္ေရး (communications) ပိုင္းအတြက္ အဓိကထား သံုးၾကပါတယ္ ။ အထူးသျဖင့္ စစ္အတြင္းမွာ ဆက္သြယ္ၾကတဲ့အခါမိ်ဳးမွာ ေပးပို့လိုက္တဲ့ မက္ေစ့ခ်္ကို ရန္သူဘက္ကေန ျဖတ္ယူနိုင္လိုက္ရင္ ၊ ဆိုလိုခ်င္တာေတြ မသိေအာင္ လုပ္တဲ့ေနရာေတြမွာ အလြန္အေရးပါပါတယ္ ။ ခုေနာက္ပိုင္းေခတ္မွာေတာ့ ေန့စဥ္ commercial world က ေနရာတိုင္းလိုလိုမွာ (ဥပမာ - ကြ်န္မတို့ ေန့စဥ္ေရးေနတဲ့ အီးေမးလ္ေတြ ဘာေတြမွာေတာင္) လံုျခံဳေရးအတြက္ လိုအပ္သလို သံုးစြဲလာၾကပါတယ္ ။ ဒီပို့စ္မွာေတာ့ ဆက္သြယ္ေရးပိုင္းကေနပဲ အဓိကထား ၾကည့္ပါမယ္ ။ ဒီနည္းပညာ ေပၚေပါက္လာရတဲ့ အဓိက အေၾကာင္းရင္း အခ်က္နွစ္ခ်က္ကေတာ့ - -

(၁) the need for privacy or for preventing eavesdropping (ကိုယ့္ကိစၥ သူမ်ားေဘးကေန ခိုးမသိနိုင္ေအာင္)

(၂) the need for authentication or for preventing spoofing (မက္ေစ့ခ်္ကို ၾကားကေန ျဖတ္ ၊ မူရင္းမက္ေစ့ခ်္ကို လြဲမွားသြားေအာင္ အေၾကာင္းအရာ ေလွ်ာက္ထည့္တာမိ်ဳး)

ဒီနည္းပညာကိုသံုးတဲ့ေနရာကိုၾကည့္မယ္ဆိုရင္ ဆက္သြယ္ေရးပိုင္းေတြမွာ အဓိကရွိတဲ့ အပိုင္းသံုးပိုင္းျဖစ္တဲ့အျပင္ ၊ ပို့လိုက္တဲ့ လွ်ိဳ ့၀ွက္စာေတြကို ေဖာ္ထုတ္နိုင္မယ့္ ကီး (key) ဆိုတာလည္း ပါ၀င္ပါတယ္ - -

(1) Sender (in this case is known as Encipher)
(2) Receiver (in this case is known as Decipher)
(3) Channel (ပို့သူ နဲ့ လက္ခံရရွိသူၾကား ရွိတဲ့လိုင္း - အဓိကဥပမာကေတာ့ ေလလႈိင္း)
(4) Key

အဲဒီအပိုင္းေလးပိုင္း ဘယ္လိုလုပ္ၾကလဲဆိုတာ ဥပမာေပးရရင္ေတာ့ ... လူတေယာက္ (sender/ encipher) ဟာ တစံုတရာကို ေပးပို့ခ်င္တဲ့အခါ အဲဒီအရာကို ေသတၱာတခုထဲထည့္ ေသာ့ (key) ပိတ္လိုက္တယ္ဆိုပါဆို့ ။ အဲဒီေသတၱာထဲ သူဘာထည့္လိုက္တယ္ဆိုတာ အဲဒီေသတၱာကို သြားပို့ေပးမယ့္သူ (channel) က လံုး၀မသိဘူး ။ သြားပို့ေပးသူျမင္တာက ေသတၱာတလံုးပဲ ။ အဲဒီေသတၱာထဲ ဘာရွိလည္းဆိုတာ သိနိုင္ဖို့ ေသာ့ဖြင့္ၾကည့္မွရမယ္ ။ အဲဒီေသာ့ကလည္း လက္ခံရရွိမယ့္သူ (receiver/ decipher) ဆီမွာပဲ ရွိတယ္ ။

ေနာက္ Digital Fortress By Dan Brown (Page 16) ထဲမွာေပးထားတဲ့ ဥပမာ တခုကေတာ့ - -

HL FKZC VD LDS
LD SNN

အဲဒီနွစ္ေၾကာင္းကို ဒီအတိုင္းဖတ္မယ္ဆို အဓိပၸါယ္ဘာမွမရွိသလိုပါပဲ ။ ဒါေပမယ့္ အဲဒီစာေၾကာင္းမွာရွိတဲ့ စကားလံုးတိုင္းကို အဲဒီစကားလံုးမတိုင္ခင္က စကားလံုးနဲ့ အစားထိုးၾကည့္လိုက္မယ္ဆိုရင္ ၊ ေအာက္ပါအတုိင္းေပၚလာပါမယ္ ။

IM GLAD WE MET
ME TOO

ဒီေတာ့ အဲလို စကားလံုးတိုင္းကို တျခားစကားလံုးနဲ့အစားထိုးရမယ္ဆိုတာက ကီး ပါပဲ ။ အဲဒီ ကီး မရွိခဲ့ရင္လည္း အထက္ပါစာေၾကာင္းကို စကားလံုးေတြ ဟိုေရႊ ့ဒီေရႊ ့လုပ္ၾကည့္ ၊ နည္းအမိ်ဳးမိ်ဳး ၾကိဳးစားၾကည့္ျပီး ေနာက္ဆံုး မွန္တဲ့ ကီး ကို ရွာေတြ ့သြားနိုင္ပါတယ္ ။ ဒီဥပမာမွာဆိုရင္ အဂၤလိပ္စကားလံုး ၂၆ လံုးရွိတဲ့အတြက္ ၂၆ ခါ ၾကိဳးစားရမယ္လို့ ေယဘူယ် သတ္မွတ္ပါတယ္ ။ အဲလို trial-and-error guessing method (တခုနဲ့ လုပ္ၾကည့္လိုက္ ၊ မရရင္ ေနာက္တခုနဲ့ လုပ္လိုက္) ကို သံုးတဲ့အခါ brute force attack (အတင္းဓမၼ ရွာေဖြျခင္း / တိုက္ခိုက္ျခင္း) လို့ ေခၚပါတယ္ ။

အဲဒီနည္းဟာ သခ်ၤာပိုင္းကေနၾကည့္မယ္ဆိုရင္ ရာခိုင္ႏႈန္းျပည့္ ေအာင္ျမင္မယ့္ နည္းလမ္းပါပဲ ။ ဘာလို့လဲဆိုေတာ့ ကီး တခုဟာ ဂဏန္း ၅လံုးပါခဲ့မယ္ဆိုရင္ ၀၀၀၀၀ - ၉၉၉၉၉ ၾကားက combination အမိ်ဳးမိ်ဳးကို ၾကိဳးစားမယ္ဆိုရင္ ၊ အဲဒီ combination ေတြထဲက တခုမဟုတ္ တခုကေတာ့ ကီး ျဖစ္ေနမွာပါပဲ ။ အဲဒီေတာ့ ကီး က ဂဏန္းမ်ားလာေလေလ ၊ စစ္ၾကည့္ရမယ့္ combination ေတြ မ်ားလာေလေလ ၊ ဒါေၾကာင့္ အဲဒီ ကီး ကို ခန့္မွန္းရဖို့ ခက္ေလေလျဖစ္ပါတယ္ ။

ဒါေၾကာင့္ ခုေခတ္မွာ password ေတြ ေရြးတဲ့အခါ ရွည္ရွည္ေရာ ဂဏန္းေတြ ၊ စာလံုးေတြ ၊ သေကၤတ သံုးျပီး ထည့္ခိုင္းတာပါ ။ ဂဏန္းဆို ၁ - ၉ (၁၀လံုး) ၊ စာလံုးဆို a - z (၂၆ လံုး) နဲ့ ေနာက္ သေကၤတေတြေရာအပါအ၀င္ ထည့္လိုက္မယ္ဆိုရင္ ရွည္ေလ ၊ စစ္ၾကည့္ရမွာေတြ မ်ားလာေလပါပဲ ။ အဲလို မ်ားလာတဲ့ combination ေတြကို စစ္ၾကည့္ဖို့ အရမ္းျမန္တဲ့ processor ေတြ လိုအပ္ပါတယ္ ။ အဲဒီအခ်က္က brute force attack ကေန အဓိက ကာကြယ္နည္းတမိ်ဳးပါပဲ ။

သမိုင္းမွာ စကား၀ွက္ေတြကို စသံုးသူတေယာက္ကေတာ့ Julius Caesar ပါပဲ ။ ကိုယ္ေျပာခ်င္တာကို စကားလံုးတလံုးကို ေရႊ ့ျပီး ၊ စကား၀ွက္လုပ္တဲ့ (monoalphabetic cipher) နည္းကို Caesar က Gallic wars မွာ စသံုးခဲ့တဲ့အတြက္ Caesar Cipher လို့အမည္တြင္ခဲ့ပါတယ္ ။ အဲဒီ လွ်ိဳ ့၀ွက္နည္းရဲ့ ဥပမာကေတာ့ - -
Message: N O W I S T H E T I M E
Code: Q R Z L V W K H W L P H
Key: shift the alphabets by one position and replace it in the message to get the code


ေနာက္ စကား၀ွက္နည္း တမိ်ဳးကေတာ့ ေအာက္မွာ ေဖာ္ျပထားတဲ့ polybius square လို့အမည္ရတဲ့ 5x5 square array ကို သံုးတာပါပဲ ။
polybius%20square.JPG

အဲဒီနည္းကို သံုးျပီးလုပ္မယ္ဆိုရင္ ေအာက္ပါအတိုင္း မက္ေစ့ခ်္ ကို လွ်ိဳ ့၀ွက္လို့ ရပါတယ္ - -
Message: N O W I S T H E T I M E
Code: 33 43 25 42 34 44 32 51 44 42 23 51
Key: Find the corresponding column&row number for each alphabet and replace.

ေနာက္ စကား၀ွက္နည္းတမိ်ဳးကေတာ့ Trithemius Progressive Key ဆိုတဲ့နည္းပါပဲ ။ အဲဒီနည္းမွာ a - z အထိရွိတဲ့ စကားလံုးေတြကို တလံုးခ်င္းဆီ ညာဘက္ကို ေရြ ့ျပီး ၊ z ျပီးတဲ့အခါ က်န္တဲ့ေနရာကို a ကေန ျပန္စပါတယ္ ။
IMG_0002%7E1.jpg

အဲဒီနည္းကိုသံုးတဲ့ဥပမာကေတာ့ - -

Key: T Y P E T Y P E T Y P E
Message: N O W I S T H E T I M E
Code: G M L M L R W I M G B I

ဒီနည္းမွာေတာ့ Key က အေပၚကပံုထဲက ဇယားထဲက ဘယ္ row ကို ၾကည့္ရမလဲဆိုတာ ရည္ညႊန္းပါတယ္ ။ ခု ဥပမာမွာ ပထမဆံုးအလံုးက T ျဖစ္ေနလို့ row 19 ကို ရည္ညႊန္းပါတယ္ ။ ေနာက္ မက္ေစ့ခ်္က N ျဖစ္တဲ့အတြက္ plaintext ဆိုတဲ့ေနရာမွာ N စကားလံုးကိုရွိျပီး ၊ အဲဒီ ေကာ္လံ နဲ့ ခုန ရိုး ၁၉ တို့ ဆံုတဲ့ေနရာက စကားလံုးကို ကုဒ္ အျဖစ္ယူလိုက္ပါတယ္ ။

အေပၚမွာ ေဖာ္ျပထားတဲ့ cipher (စကား၀ွက္နည္း) သံုးခုကေတာ့ cryptology မွာ မူလအဆင့္ျဖစ္တာေတြပါပဲ ။ ေနာက္ဆံုးအေနနဲ့ စဥ္းစားမိတဲ့ စကား၀ွက္ကို ၾကိဳးစားၾကည့္ၾကပါဦးလား ။ အဂၤလိပ္လို ဘာကိုဆိုလိုတာပါလဲ ။ သိပ္လြယ္လြန္းသြားရင္ေတာ့ ေနာက္ထပ္ စဥ္းစားထားတာ ရွိပါေသးတယ္ း) ။

Code: K H U R L
Key: Using monoalphabetic cipher. Number of alphabetic shifts = a prime number


References:
[1] Digital Communications: Fundamentals And Applications (Bernard Sklar) - All cipher examples were taken from there.
[2] http://en.wikipedia.org/wiki/Dan_Brown
[3] http://www.biblio.com/authors/558/Dan_Brown_Biography.html
Ref: /engineersformyanmar


Labels: ,

Print ပဲထုပ်ပါ..pdf ထုပ်လျှင်.ဖောင့်လွဲနေလိမ့်မယ်


မာတိကာ ၁ မာတိကာ ၂ မာတိကာ ၃ မာတိကာ ၄ မာတိကာ ၅
0 comments

KKZ Myanmar Unicode Keyboard

Mone Tine On Android

►Version 1.1

►Version 1.0

MoneTineKeyboard

Like လုပ်ထားနိုင်ပါတယ်

Mone Tine Knowledge Bank

Labels

အောက်ကကြေငြာလေးကလစ်ပေးပါဦး

Usage Policies

သင်၏ Facebook  တွင် ဖတ်နိုင်ရန် LIKE လုပ်ခဲ့ပါ..
( အမှန်ခြစ် ပေါ်နေပြီး LIKE ပြီးသားပါက CLOSE ကိုသာနှိပ် ပိတ်ပါ )

ကျေးဇူးတင်ပါတယ် မုန်တိုင်း

ကျန်းမာကြပါစေ